


Connections 44
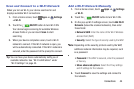
Scan and Connect to a Wi-Fi Network
When you turn on Wi-Fi, your device searches for and
displays available Wi-Fi connections.
1. From a Home screen, touch Apps ➔ Settings
➔ Wi-Fi.
2. Touch the ON/OFF button to turn Wi-Fi ON.
Your device begins scanning for available Wireless
Access Points or you can touch Scan to start
searching.
3. When your device completes a scan, touch a Wi-Fi
network to connect. If the Wi-Fi network is open, you
will be automatically connected. If the Wi-Fi network is
secured, enter the password at the prompt to connect.
Tip: You can have your device automatically notify you of
available networks. See “Wi-Fi notifications” under
“Wi-Fi Settings” on page 45.
Add a Wi-Fi Network Manually
1. From a Home screen, touch Apps ➔ Settings
➔ Wi-Fi.
2. Touch the ON/OFF button to turn Wi-Fi ON.
3. On the pop-up Wi-Fi settings screen, touch Add Wi-Fi
Network (below the scanned networks), then enter
these fields:
• Network SSID: Enter the name of the Wi-Fi Wireless
Access Point (WAP).
•Security: Select the type of security used by the WAP.
Note: Depending on the security protocol used by the WAP,
additional network information may be required, such
as a password.
• Password: If the WAP is secured, enter the password
or hex key.
• Show advanced options: Select the Proxy settings
and IP settings for the network.
4. Touch Connect to save the settings and connect to
the network.