


Removal and replacement procedures 28
• The system automatically sets all drive numbers.
• If only one hard drive is used, install it in the bay with the lowest number.
• Hard drives must be SFF types.
• Drives must be the same capacity to provide the greatest storage space efficiency when drives are grouped
together into the same drive array.
CAUTION: Remove or replace a hard drive only when the drive failure LED is amber. Data loss can occur if a
drive is removed when the drive Online/Activity status LED is green. See “Hot-plug SAS or SATA hard drive
LEDs” in Chapter 4, “Server component identification,” for more information.
CAUTION: Remove or replace only one hard drive at a time. The controller relies on other drives to reconstruct
data on the replaced drive. Drive reconstruction is active when the drive Online/Activity status LED is flashing
green.
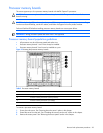
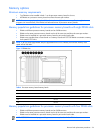
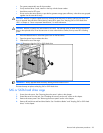
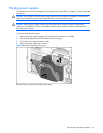
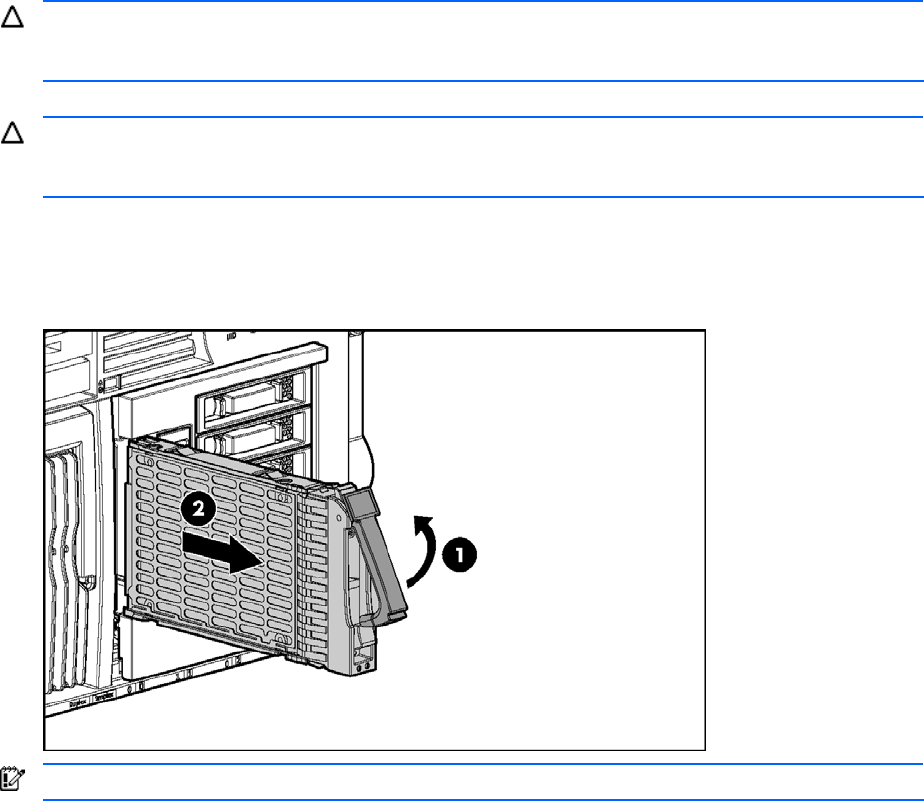
1. Press the release button to unlock the ejector lever on the hard drive.
2. Open the ejector lever to release the drive.
3. Slide the drive out of the cage.
Figure 21 Removing a hot-plug SAS or SATA hard drive
IMPORTANT: Always populate hard drive bays starting with the lowest SCSI ID.
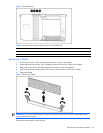
Reverse the steps to replace a hot-plug SAS or SATA hard drive.
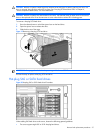
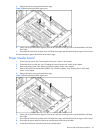
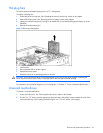
SAS or SATA hard drive cage
1. Power down the server. See “Powering down the server” earlier in this chapter.
2. Extend the server from the rack. See “Extending the server from the rack” earlier in this chapter.
3. Remove the access panel. See “Removing the access panel” earlier in this chapter.
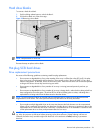
4. Remove all hard drives and hard drive blanks. See “Hard drive blanks” and “Hot-plug SAS or SATA hard
drives” in this chapter.