


Removal and replacement procedures 48
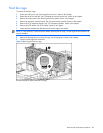
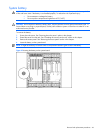
System board
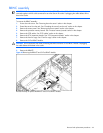
To remove the system board:
1. Power down the server. See “Powering down the server” earlier in this chapter.
2. Remove all power supplies. See “Hot-plug power supply” earlier in this chapter.
NOTE: Label the individual hard drives before pulling them out.
3. Remove all the hot-plug SCSI hard drives. See “Hot-plug SCSI hard drives” earlier in this chapter.
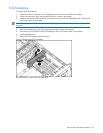
4. Extend the server from the rack. See “Extending the server from the rack” earlier in this chapter. Although not
required, HP recommends removing the server from the rack for best performance. See “Removing the server
from the rack” earlier in this chapter.
5. Remove the access panel. See “Removing the access panel” earlier in this chapter.
6. Remove the processor memory boards. See “Processor memory boards” earlier in this chapter.
7. Remove the SCSI cables. See “SCSI cables” earlier in this chapter.
8. Remove the PCI-X expansion boards. See “PCI-X expansion boards” earlier in this chapter.
9. Remove the front fan cage. See “Front fan cage” earlier in this chapter.
10. Remove the rear fan cage. See “Rear fan cage” earlier in this chapter.
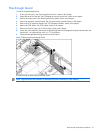
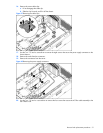
11. Remove the pass-through board. See “Pass-through board” earlier in this chapter.
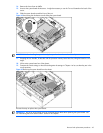
12. Remove the SCSI backplane. See “SCSI backplane” earlier in this chapter.
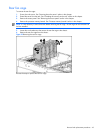
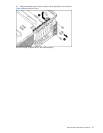
13. Remove the BBWC assembly. See “Battery-Backed Write Cache assembly” earlier in this chapter.