


Removal and replacement procedures 29
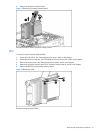
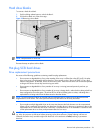
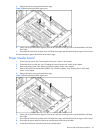
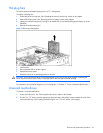
5. Remove the screws securing the hard drive cage.
Figure 22 Removing the hard drive cage screws
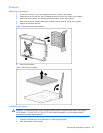
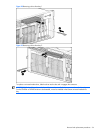
6. Slowly pull the SAS hard drive cage out of the server until there is enough room to reach behind the SAS hard
drive cage.
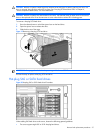
7. Disconnect all cables from the back of the SAS hard drive cage, and slide the hard drive cage out of the server.
Reverse the steps to replace the SAS-SATA hard drive cage.
Power transfer board
1. Power down the server. See “Powering down the server” earlier in this chapter.
2. Extend the server from the rack. See “Extending the server from the rack” earlier in this chapter.
3. Remove the access panel. See “Removing the access panel” earlier in this chapter.
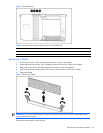
4. Remove all hard drives and hard drive blanks. See “Hard drive blanks” and “Hot-plug SAS or SATA hard
drives” in this chapter.
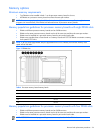
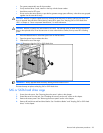
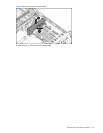
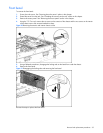
5. Remove the screws securing the hard drive cage.
Figure 23 Removing the hard drive cage screws
6. Slowly pull the SAS hard drive cage out of the server until there is enough room to reach behind the SAS hard
drive cage.
7. Disconnect all cables from the back of the SAS hard drive cage, and slide the hard drive cage out of the server.
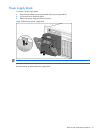
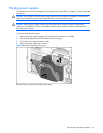
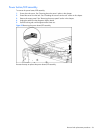
8. Disconnect the power cable from the power transfer board, and remove the cable.
9. Loosen the thumbscrew, and remove the power transfer board.