


10 Unpacking and Installation
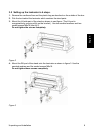
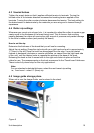
5. Finally, mount the middle part between the LH- and RH parts.
Use two serrated washers and two socket screws M6x16.
Do not tighten these screws completely
Figure 4
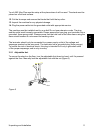
6. Taking care to align the top of the LH stand so that it is parallel with the blue plastic
cover and there is a small gap (1-2 mm) between the blue cover and the stand, tighten
the 2 screws that hold the stand to the machine.
7. Taking care to align the top of the RH stand so that it is parallel with the blue plastic
cover and there is a small gap (1-2 mm) between the blue cover and the stand, tighten
the 2 screws that hold the stand to the machine.
8. When all of the above steps have been completed in sequence, then tighten the 6
screws that hold the tie bar to the RH and LH stand.
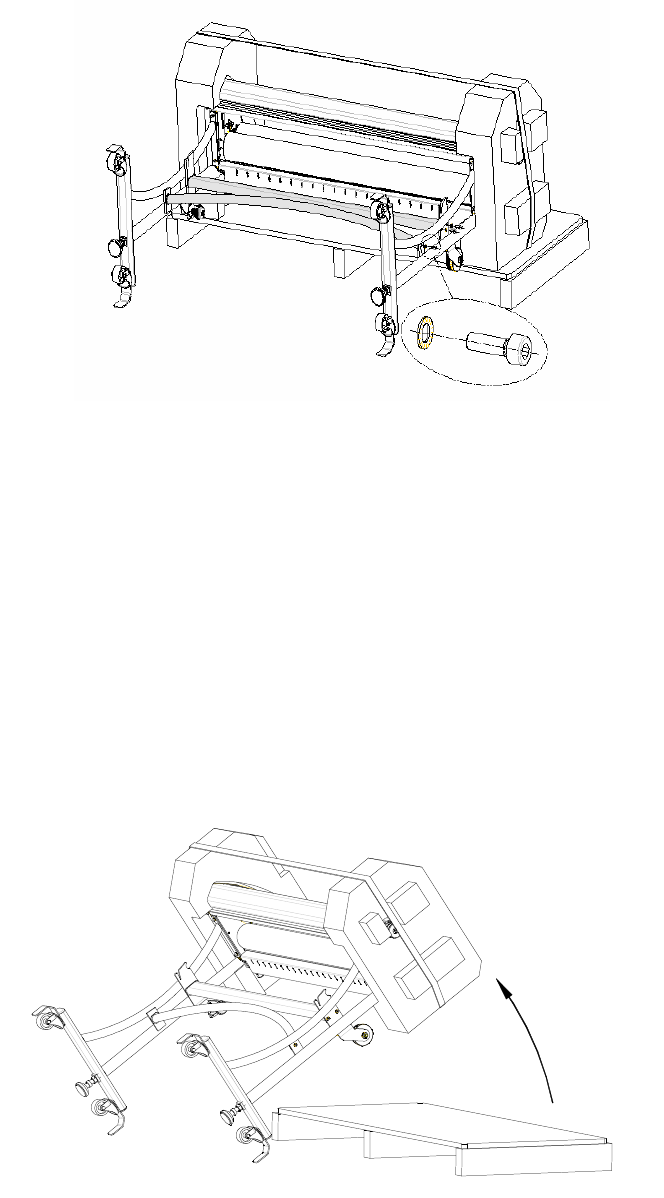
9. Lift the laminator from the pallet and position it onto it’s castors.
10. Make sure that the stand legs do not slide away during lifting.
11. Remove the protecting covers.
Figure 5