


SPECIAL MODES
5-30
■
■■
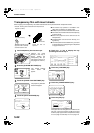
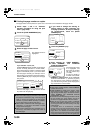
■ Common operation procedure for using the print menu
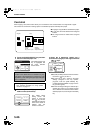
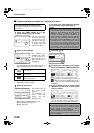
1
Touch the [PRINT MENU] key in the
special modes screen (3rd screen).
The print menu setting
screen will appear. The
print menu icon ( ) will
also appear in the upper
left corner of the screen
to indicate that the
function is turned on.
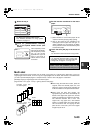
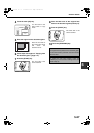
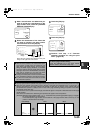
2
Select the print position.
Six positions are
available: left, centre,
or right of the top or
bottom of the page.
The touched key is
highlighted.
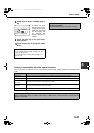
The keys indicating the print position appear as
follows depending on the state of the setting:
The image displayed within each key varies
depending on the key position.
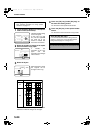
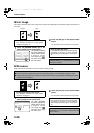
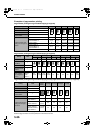
3
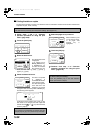
Select the print menu.
The settings screen of
the print menu
appears.
For information on
each of the print
menus, see the
settings of each.
●DATE (page 5-32) ● STAMP (page 5-33)
●PAGE NUMBERING (page 5-34)
●TEXT (page 5-38)
4
To select print menu settings at another
print position, repeat steps 2 and 3.
5
Touch the key.
6
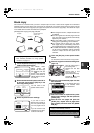
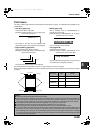
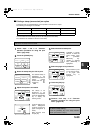
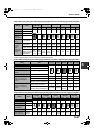
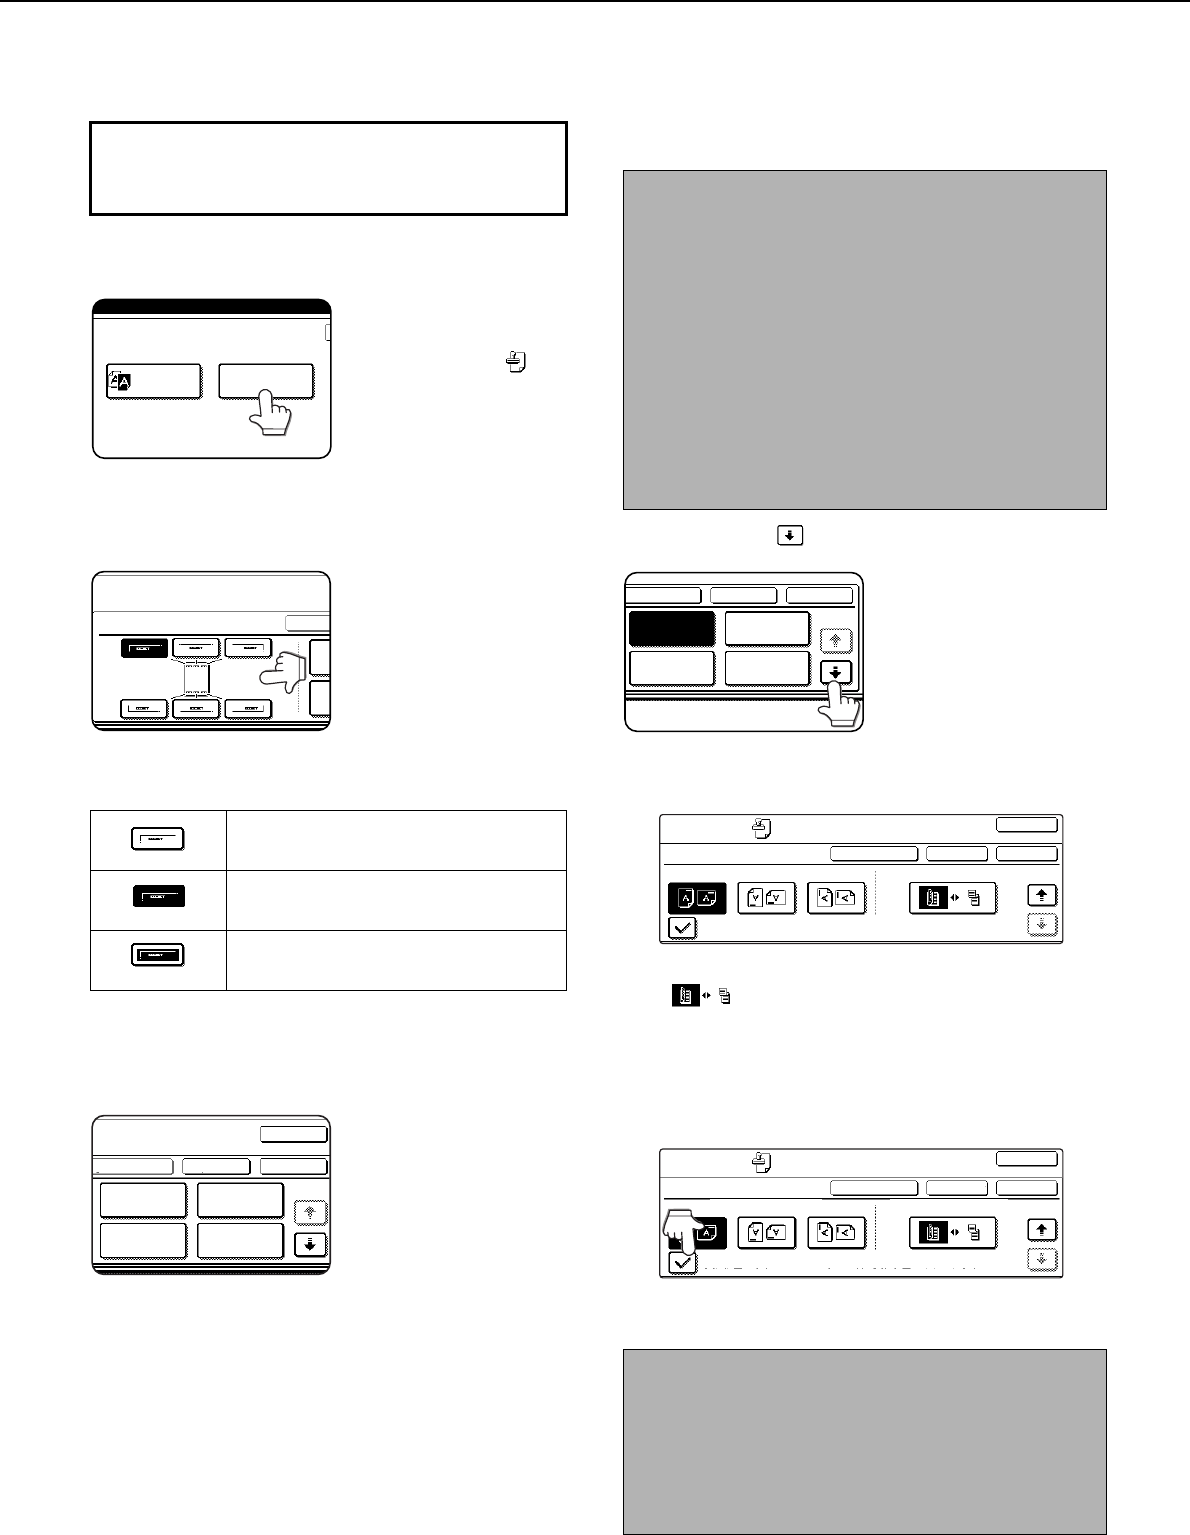
To specify the orientation of the original,
touch the [ORIGINAL ORIENTATION] key.
If you placed a two-sided original, touch the
[ ] key to specify the binding style (book or
tablet). The icon of the selected binding style is
highlighted.
7
If you are adding covers or inserts, select
whether or not you wish to print on the
covers or inserts.
If you do not wish to print on covers or inserts,
touch the checkbox to remove the checkmark.
To display the special modes screen...
See "General procedure for using special functions"
on page 5-2.
Not selected, print menu setting has not
been selected.
Selected during selection of the print
menu setting.
Not selected, print menu setting has
already been selected.
PRINT MENU
B/W
REVERSE
SPECIAL MODES
PRINT MENU
LAYOU
N
OK
OKCANCELLAYOUT
DATE STAMP
TEXT
PAGE
NUMBERING
1/2
NOTES
● If the [DATE], [PAGE NUMBERING], or [TEXT] key
is touched when other than a "STAMP" print menu
setting has been selected for the print position
selected in step 2, a message will appear. To
overwrite the previously set print content of the
print menu that you touched, touch the [YES] key.
To keep the previous settings, touch the [NO] key.
●
The "DATE" and "PAGE NUMBERING" cannot be set
in multiple positions. If either of these keys is touched
when a date or page numbering setting has already
been configured, a message will appear asking you if
you wish to move the print settings to the position that
you selected in step 2. To move the print settings,
touch the [YES] key. Otherwise touch the [NO] key.
NOTES
●
If you are not copying on covers or inserts, printing will
not take place on these even if a checkmark appears.
● A page number is never printed on covers or
inserts, regardless of the above setting.
● If covers/inserts have been disabled in the key
operator programs, the checkbox will be greyed out
to prevent selection.
1/2
LAYOUT CANCEL OK
STAMP
TEXT
DATE
PAGE
NUMBERING
OK
CANCEL
OK
LAYOUT
SPECIAL MODES
PRINT MENU
ORIGINAL ORIENTATION 2-SIDED ORIGINAL TYPE
PRINT ON COVERS/INSERTS WHEN COPYING ON COVERS/INSERTS
2/2
OK
CANCEL
OK
LAYOUT
SPECIAL MODES
PRINT MENU
ORIGINAL ORIENTATION 2-SIDED ORIGINAL TYPE
PRINT ON COVERS/INSERTS WHEN COPYING ON COVERS/INSERTS
2/2
Copy_EX.book 30 ページ 2004年9月28日 火曜日 午後9時54分