


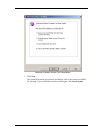

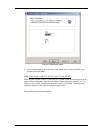

4. Enter the scanner’s IP Address or Host Name (DNS/WINS) and click OK.
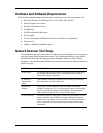
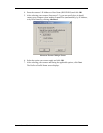
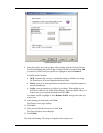
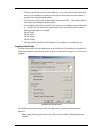
5. After selecting your scanner (from steps 2-3), you can specify how it should
contact your computer when sending scanned files (automatically, by IP Address,
or by Host Name) by clicking Advanced.
Advanced Scanner Settings Screen
6. Select the option you want to apply and click OK.
7. After selecting your scanner and setting the applicable options, click Next.
The Prefix to Profile Name screen displays.
Network Scanner Tool User’s Guide 11