


Chapter 2 Configuring the Repository Folder and RightFax Interface on the Sharp MFPs 17
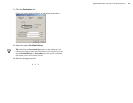
7. In the Password field, type a password for the specified FTP
user if applicable.
8. In the Directory field, type \Sharp (this is the repository folder
you created under the \Inetpub\ftproot folder on the IIS server).
9. Set Default File Format to TIFF G4.
10.The remaining settings under Server2 Setup are not used and
should not be changed. Click the Submit button at the bottom
of the screen to save and exit.
Create a RightFax User Interface on the Sharp
If you choose to use a custom RightFax user interface on the Sharp
device, you must create one or more custom Metadata sets that
include specific RightFax input fields.
To add a RightFax Metadata set
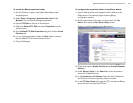
1.
Open a Web browser and navigate to the IP address of the
Sharp device. This opens a page containing Sharp
configuration options.
2. Scroll to the bottom of the pane on the left and click Fax
Server. This opens the Fax Server Setup screen.
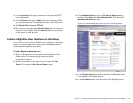
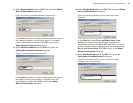
3. Click Metadata Setup under the Fax Server Setup heading,
and then click Add under New Metadata Set. This opens the
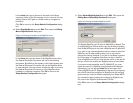
Metadata Set Control screen.
Figure 2.2 The Metadata Set Control screen for the Sharp device
4. In the Display Name field, enter a name for the Metadata set as
it will appear on the Sharp device.
5. In the Fax Server field, enter the name of the RightFax server.