


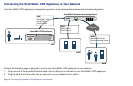
Page 14 Powering On and Connecting to the Appliance
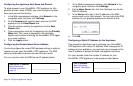
Configuring a Static IP Address on Windows
Complete the following steps to configure your management
computer with a static IP address:
Windows 7
1. Open a My Computer window.
2. Type Network Connections into the location bar at the top
of the window and press Enter.
The window changes to the Control Panel > All Control
Panel Items > Network Connections folder.
3. In the Network Connections window, double-click Local
Area Connection.
4. If the Local Area Connection Status window opens, click
the Properties button.
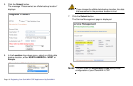
5. In the Local Area Connection Properties window, select
Internet Protocol Version 4 (TCP/IPv4), and then click
the Properties button.
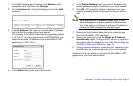
6. Select Use the following IP address and type an IP
address on the 192.168.168.0/24 subnet, such as
192.168.168.50, in the IP address field.
7. Type 255.255.255.0 in the Subnet Mask field.
8. Click OK in the Properties window.
9. Click Close in the Local Area Connection Properties
window for the settings to take effect.
Windows XP
1. On the Windows Start menu, highlight Connect To and
then select Show All Connections to open the Network
Connections window.
If Connect To is not available, directly select Network
Connections, or select Control Panel and then double-
click Network Connections in the Control Panel window.
2. In the Network Connections window, double-click Local
Area Connection.
3. In the Local Area Connection Status window, click the
Properties button.
4. In the Local Area Connection Properties window, select
Internet Protocol (TCP/IP), and then click the Properties
button.
5. Select Use the following IP address and type an IP
address on the 192.168.168.0/24 subnet, such as
192.168.168.50, in the IP address field.
6. Type 255.255.255.0 in the Subnet Mask field.
7. Click OK in the Properties window.
8. Click Close or OK in the Local Area Connection Properties
window for the settings to take effect.