17
GB
Setting Up
Setting Up
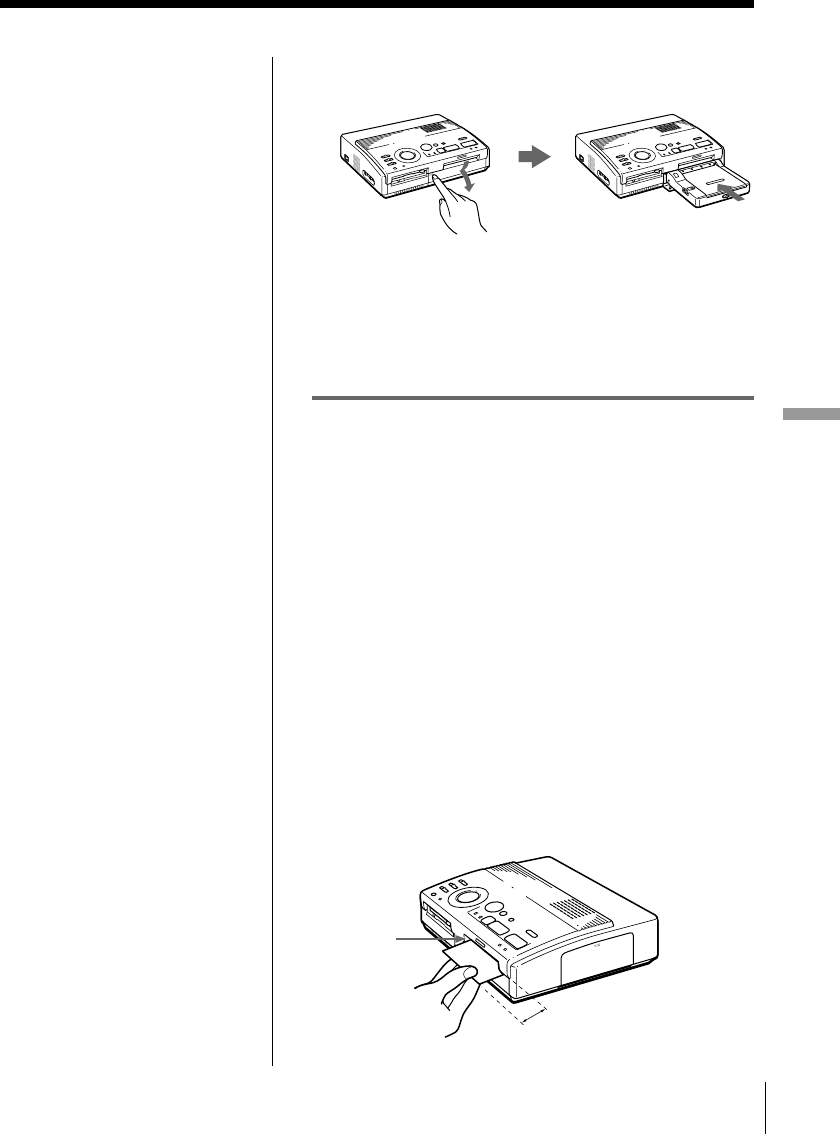
7 Press “Push” on the cover of the automatic feeder,
then insert the feeder until it clicks.
8 Press the print button of the printer.
The print paper is automatically loaded into the
printer and printing starts.
Inserting the print paper manually
Insert the print paper sheet by sheet. This section
explains how to insert the standard type print paper.
Use the print paper designated for this printer only.
1 Turn on the power of the printer.
The POWER indicator lights up.
2 Follow printing procedures.
For details, see pages 20 to 39.
3 Insert the print paper straight with its blank
printing surface facing up, along the guide to the
left of the paper port.
Insert the paper until less than 2 cm (approx. 0.8
inches) remains. The paper is automatically loaded
when printing starts.
Guide
Less than 2 cm
To stop continuous
printing
Set the dial to 1. Printing
stops after the current
printing finishes.
If print paper runs out
during continuous
printing
Remove the feeder from
the printer. Then, insert
more print paper into the
feeder and reinstall the
feeder to the printer. The
printing resumes
automatically.
Notes on inserting the
print paper manually
• Insert the print paper
straight along the guide
to the left of the paper
port. If the paper is
positioned to the right
or slanted, the printing
area may get out of
position.
• The paper may not be
loaded automatically if
you do not insert the
paper firmly.


