Editing
90
Editing
Recording from
another VCR or LD
player
Before you start editing
• Connect another VCR or LD player to the unit referring to the
connections on pages 8 and 9.
• Press VHS TUNER.
– If the TV doesn’t turn on, turn it on manually.
– If connected with only the antenna cable, set the TV to the video
channel.
• Press TAPE SPEED to select the tape speed, SP or EP.
• On this unit, set the EDIT switch to ON. If the other VCR has a
similar switch, set it to ON as well.
• Do not use the remote commander in the following procedure.
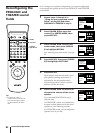
1 Insert a tape with its safety tab in
place into the unit (recording
VCR).
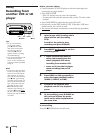
Search for the point to start
recording and press P PAUSE.
2 Press r REC on the unit to set it to
recording pause.
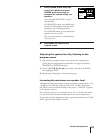
3 • Insert a source tape with its
safety tab removed into the
other (playback) VCR when
recording from another VCR.
• Insert an LD into the LD player,
when recording from an LD
player.
4 Press VIDEO or VHS repeatedly to
select the input (playback) source
(VIDEO1, VIDEO2, or LINE).
5 Search for the point to start
playback and set it to playback
pause.
6 To start editing, press P PAUSE on
this unit and release the pause
mode on the other equipment at
the same time.
To stop editing
Press the p STOP buttons on both units.
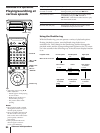
EDIT
P PAUSE
VHS
VIDEO
r REC
Tips
• To cut out unwanted
scenes while editing,
press P PAUSE on the
unit when an unwanted
scene begins. When it
ends, press P PAUSE
again to resume recording
(Assemble Editing).
• You can record audio sound
from the desired input
source on the video tape by
pressing AUDIO repeatedly
in step 4.
Note
• If you follow this procedure
to start recording, the unit’s
VCR won’t record with the
APC function. To record a
tape with the APC function,
press r REC again during
recording pause in step 2 so
the unit’s VCR analyses the
tape. Then when you start
recording in step 6, press
P PAUSE after the APC
indicator stops flashing. If
you press P PAUSE
before
the APC indicator stops
flashing, the APC function is
cancelled.


