


– 12 –
10
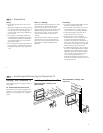
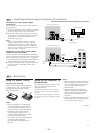
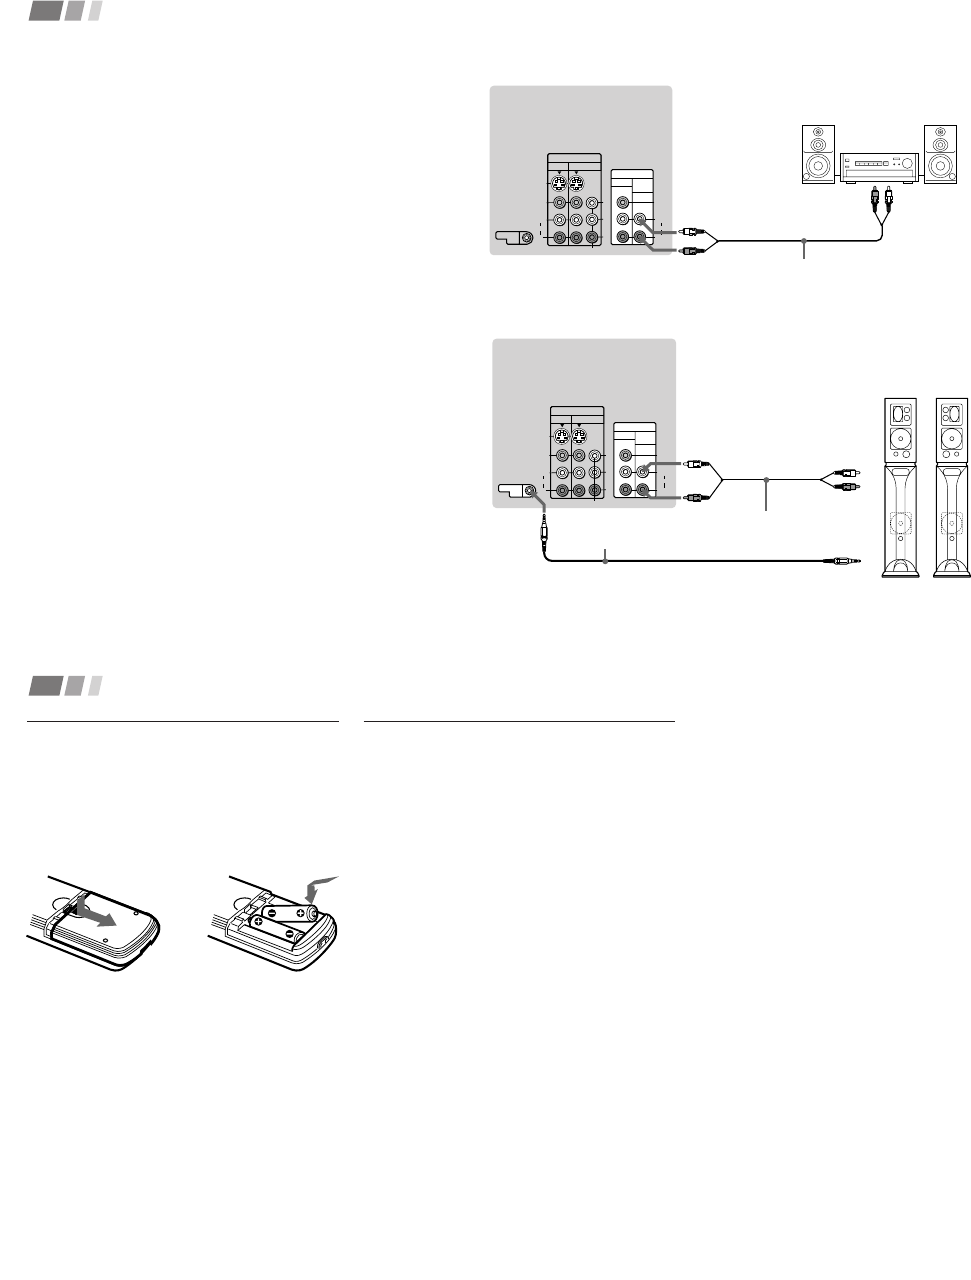
Installing and Connecting the Projection TV (continued)
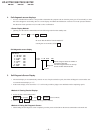
(Rear of projection TV)
RK-74A
(not supplied)
Line inputs
AUDIO-L
(white)
Stereo amplifier
AUDIO-R
(red)
S VIDEO
CONTROL S
OUT
VIDEO
AUDIO
L
R
VIDEO
(MONO)
IN
VIDEO 1 VIDEO 3
OUT
MONITOR AUDIO
(VAR/FIX)
Y
R
L
(MONO)
AUDIO
COMPONENT
HRD
Disconnect all power sources before making any connections.
Connecting an audio system (Upper
illustration)
For more dynamic sound, connect an audio system to
the projection TV.
1 Using an AUDIO cable, connect AUDIO (VAR/FIX)
OUT on the projection TV to one of the unused Line
inputs (e.g. Tape-2, AUX1, etc.) on the stereo.
2 Set the stereo to the chosen Line input and use the
Audio menu to set the audio output and switch the
TV’s speakers off. (see “Salida de audio” and
“Parlantes” on page 22)
Note:
• You can adjust VOLUME, “Graves,” “Agudos,”
“Balance,” “MTS/SAP” and “Efecto” with the
supplied remote control. The control items except
VOLUME can be adjusted only when “Salida de
audio” is set to “Variable” in the Audio menu. (see
“Salida de audio” on page 22)
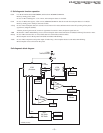
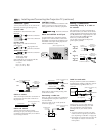
Connecting a Sony SAVA series speaker
system (Lower illustration)
Use this connection to control the speaker’s Dolby Pro
Logic surround system and super woofer mode with the
remote control. (see “Control SAVA SP ” on page 22)
1 Using the AUDIO cable supplied with the speaker to
AUDIO (VAR/FIX) OUT on the projection TV.
2 Using the CONTROL S cable, connect CONTROL S
IN on the speaker to CONTROL S OUT on the
projection TV.
(Rear of projection TV)
AUDIO-L
(white)
AUDIO-R (red)
Audio cord supplied
with the speakers
CONTROL S IN
RK-G34, etc. (not supplied)
1 IN L
1 IN R
2
SAVA series
speaker system
1
CONTROL S
OUT
S VIDEO
CONTROL S
OUT
VIDEO
AUDIO
L
R
VIDEO
(MONO)
IN
VIDEO 1 VIDEO 3
OUT
MONITOR AUDIO
(VAR/FIX)
Y
P
B
PR
R
L
(MONO)
AUDIO
COMPONENT
11
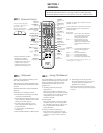
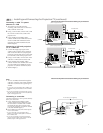
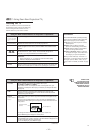
Using the Remote Control
Inserting the batteries
Insert two size AA (R6) batteries (supplied)
by matching the + and – on the batteries to
the diagram inside the remote control’s
battery compartment.
Basic Set Up
Notes:
• Remove the batteries to avoid damage
from possible battery leakage whenever
you anticipate that the remote control
will not be used for an extended period.
• Handle the remote control with care.
Avoid dropping it, getting it wet, or
placing it in direct sunlight, near a heater
or where the humidity is high.
• Your remote control can be programmed to
operate most video equipment.
(see “Operating Video Equipment” on
page 30)
(continued)
Notes:
• Before you perform AUTO SET UP again,
make sure that the input from ANT (not
AUX) is selected by pressing ANT until
“AUX” does not appear next to the
channel number.
• Perform this function during the day,
with the antenna and/or cable properly
connected, to ensure that all available
channels will be broadcasting and
receivable.
• When you perform AUTO SET UP, all the
settings in the Video, and Audio menus
are reset to the factory settings.
Setting Up the Projection TV
Automatically
The AUTO SET UP feature will allow you to
set the on-screen language and set all
receivable channels.
The AUTO SET UP feature does not apply for
installations that use a cable box for all channel
selection.
You can also set up the projection TV manually.
(see “Using the Ajuste de canal Menu” on pages
24 and 25)