


– 18 –
22
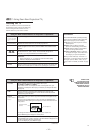
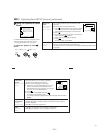
Adjusting Your SET UP (menus) (continued)
Parlantes
Custom selection
of audio output
source
Salida de audio
Easy control of
volume adjustment
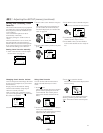
Control SAVA SP
Controls Sony
SAVA speaker’s
mode.
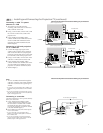
Sí: Select to listen to the sound from the projection TV speakers alone.
No: Select to turn off the projection TV speakers and listen to the
projection TV’s sound only through an external audio system’s speakers.
SAVA SP: Select to turn off the projection TV speakers and listen to the projection
TV’s sound only through the Sony SAVA series speaker system. You can
adjust volume, muting, “Modo surround,” and “Modo superwoofer” with the
projection TV’s remote control. (see “ Control SAVA SP” below)
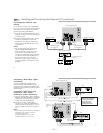
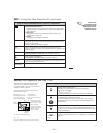
“Salida de audio” can only be set when “Parlantes” is set to “No.”
Fijo: Sound output is held at a fixed level through the audio system.
Use the AV receiver’s remote control to adjust the volume.
Variable: Sound output varies according to the TV settings.
Useful when you want to use your remote control to control the output of a
separate audio system.
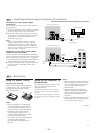
“Control SAVA SP” can only be set when Sony SAVA speaker system is
connected to the AUDIO (VAR/FIX) OUT connectors and “Parlantes” is set to
“SAVA SP.” (see “Parlantes” above)
You can also adjust the SAVA speaker’s volume using VOL +/– of the projection
TV’s remote control.
Modo surround: Select to activate the SAVA Speaker’s surround mode.
Modo superwoofer: Select to activate the SAVA Speaker’s super woofer mode.
23
Hora de verano
Automatically
adjusts the time.
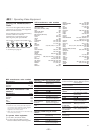
Fijar hora actual
Necessary for the
Timer.
Cronómetro
Wake up or
scheduled viewing.
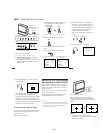
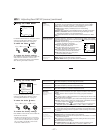
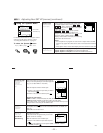
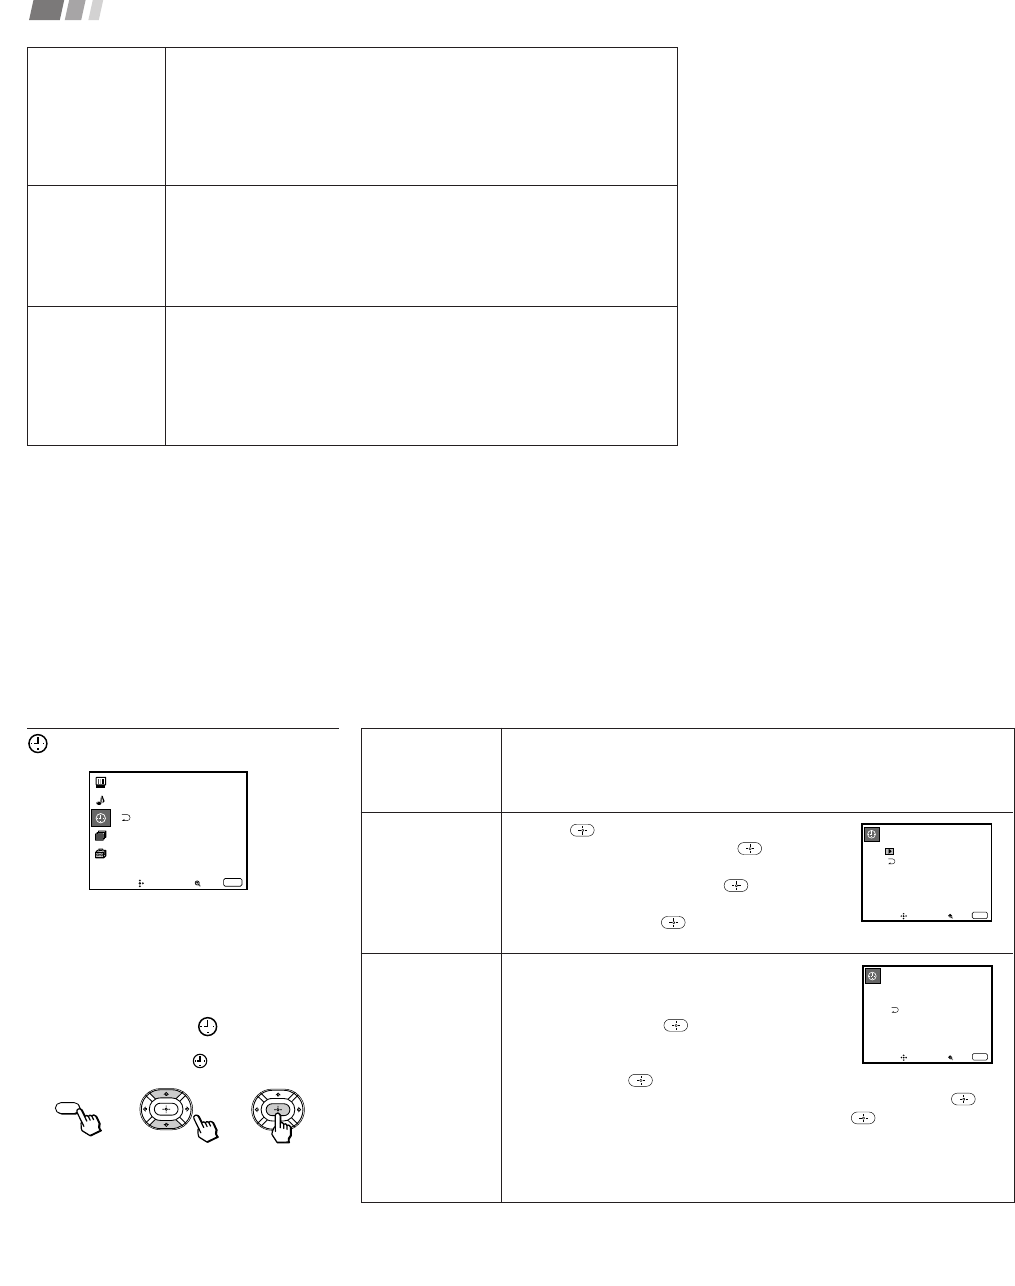
Using the Reloj Menu
After setting the clock you can use the timer
to turn the projection TV on and off.
For detailed information on using the remote
control to modify menu settings, refer to
“Learning Menu Selection” on page 19.
To select the Reloj menu:
Display / Highlight / Select
Tip
z
Set daylight saving time before setting the clock. Any
loss of power will cause these settings to be erased.
Spring: Select Sí to compensate for Daylight Saving Time.
The current time automatically moves ahead one hour.
Fall: Select No at the end of Daylight Saving Time.
The current time moves back one hour.
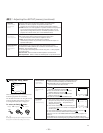
1 Press
, then press V or v until the current day
(Sun-Sat) is displayed, and press
.
2 Press V or v until the current hour (1-12) and
AM/PM is displayed, and press
.
3 Press V or v until the current minute (00-59) is
displayed, and press
.
The clock has now started. Press MENU to exit.
1 Press V or v until the desired day or range of days
(Every Sun-Sat, Every Mon-Fri, Sunday, Monday, ...
Saturday, Every Sunday, ... Every Saturday) is
displayed, and press
.
2 Press V or v until the time (hours and minutes) that
you want the projection TV to remain on is displayed,
and then press
.
3 Press V or v to set the time duration (maximum of 6 hours) and press
.
4 Press V or v to select the desired channel and press
.
The timer is now set. The TIMER/STAND BY indicator on your projection TV
will be lit.
Press MENU to exit. To cancel your timer setting, press RESET while in the
Cronómetro window. Performing Auto programación will erase all “Reloj” settings.
MENU
Reloj
Hora de verano: Sí
Fijar hora actual
Cronómetro
----- : -AM-
ch
Mover Seleccionar Salir
MENU
Fijar hora actual
–––
––: –AM–
Mover Seleccionar Salir
MENU
Cronómetro
––––––
––: ––AM
–
hch
–––
Dom
12:00AM
Mover Seleccionar Salir
MENU