


Setups
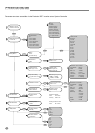
General Setup Procedure
Decide which Setup you are going to build.
Connect the Precision iDP
™
monitors exactly as shown on the following pages.
Power up all monitors.
Set one of the Master-monitors as the System Controller as shown on the Setup diagrams. Leaving the TC LINK
button on the rear panel in the OUT position does this.
NOTE: There can be only ONE System Controller in a setup.
After “power-up” the System scans all connected monitors every 5 seconds.
Set tasks for all monitors from the System Controller (unless you have iDP SOFT
™
* or PC-iP
™
**)
Enter Setup menu by pressing ENTER, ARROW DOWN, ENTER.
Select the setup type you are using.
Press ENTER again and the System will generate Pink Noise in one of the monitors.
Select appropriate task for the monitor currently fed with Pink Noise using the ARROW keys and press ENTER
to confirm.
Continue allocating tasks for all monitors in the system.
Your monitor system is now set up ready for calibration and fine-tuning.
* iDP SOFT
™
is explained later in this Manual
** Precision iDP PC-iP
™
has it’s own dedicated user manual
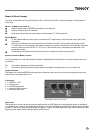
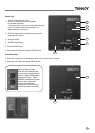
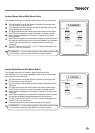
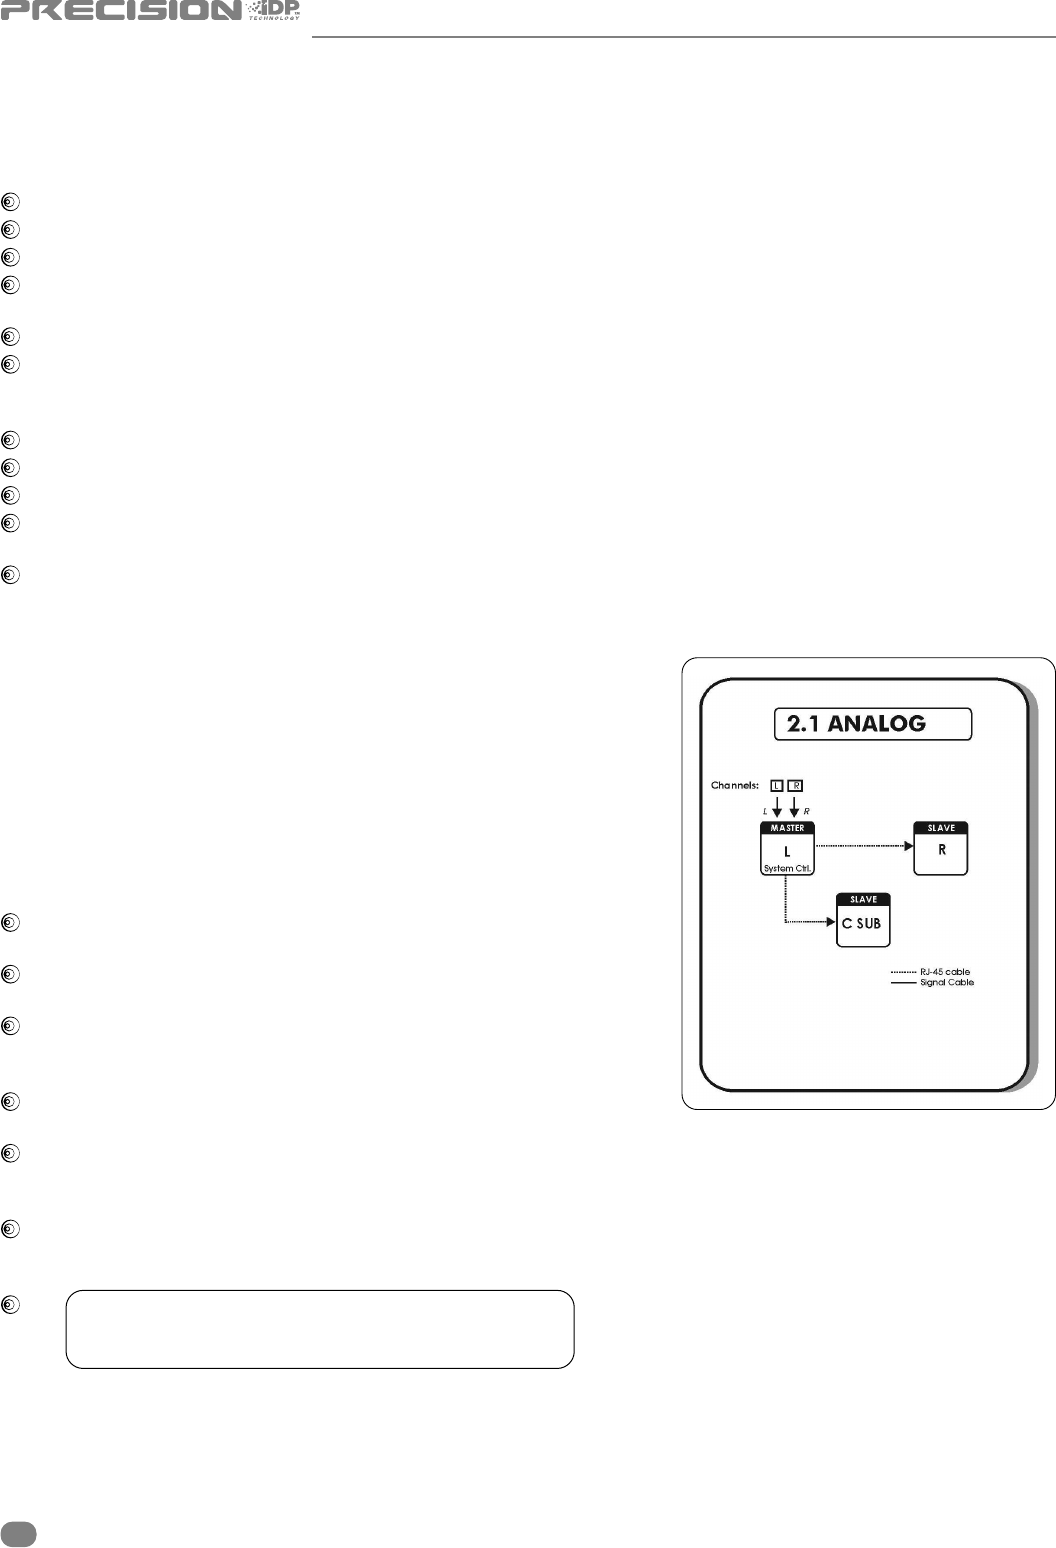
Analog Stereo Set-up With Mono Sub(s)
The diagram shows how to connect a stereo set-up with
one subwoofer. If you are using a standard stereo set up
(no subwoofer) then simply omit the subwoofer.
The Left monitor is set as the System Controller by
leaving out the TC Link button on the rear panel.
The Left master monitor receives both the left and
right input signals via the analog input connectors.
The Right monitor and Sub receive audio and control
via the output RJ45 TC Link connections on the Left
(system controller) monitor.
When no Bass management is selected, no signal
will be sent to the subwoofer.
When Bass management is selected, low frequency
content from the left and right channels is extracted
and sent to the subwoofer.
The iDP
™
Remote, iDP SOFT
™
or PC-iP
™
can be connected
to any spare TC Link “out” connection.
! REMEMBER – To set a master monitor as the system
controller the TC Link button on the rear panel
MUST be in the out position.
16
ACTIVE STUDIO MONITORS