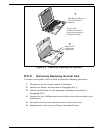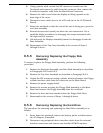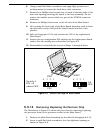
4. Using a plastic stick, unlock the ZIF connector located near the
Touchpad and remove the cable from the connector. Also, remove the
2-connector speaker cable from the Main Board Connector.
5. Remove the cable cover below the display by lifting upward on the
front edge of the cover.
6. Disconnect three cables (two to the LCD and one to the LCD/Switch
Board).
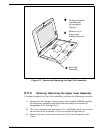
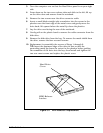
7. Rotate the notebook so that the rear of the unit is facing you; open the
rear door assembly.
8. Several recesses are located just above the rear connectors. Use a
small flat-blade screwdriver to disengage the snaps associated with
the right and left recesses.
9. Lift and push the Display Assembly forward to disengage it from the
Base Assembly.
10. Replacement of the Top Case Assembly is the reverse of Steps 1
through 9 above.
6.5.5
Removing/Replacing the Floppy Disk
Assembly
To remove/replace the Floppy Disk Assembly, perform the following
procedure:
1. Remove the Keyboard Assembly and Heat Sink Assembly as described
in Paragraphs 6.5.2 and 6.5.3.
2. Remove the Top Case Assembly as described in Paragraph 6.5.4.
3. Unlock the ZIF connector (using a plastic stick) and remove the Floppy
to Main interface cable from the connector on the Main Board.
4. Remove the power supply shield.
5. Remove the screws securing the Floppy Disk Assembly to the Main
Board and remove the Floppy Assembly from the notebook.
6. Remove the front and rear brackets from the Floppy Disk Drive.
7. Reassembly is the reverse of Steps 1 through 6 above.
6.5.6
Removing/Replacing the Hard Drive
The procedure for removing and replacing the Hard Drive assembly is as
follows:
1. Power down the notebook, remove the battery packs, and disconnect
the AC Adapter, if installed.
2. Disconnect any peripheral device interface cables from the external
interface connectors and remove any installed PCMCIA options.
Field Service
6-11


