


5-7
Chapter 5: OPERATION SETTINGS (NX-100 OPERATION PROGRAM)
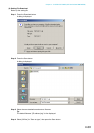
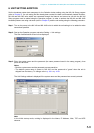
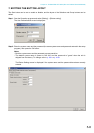
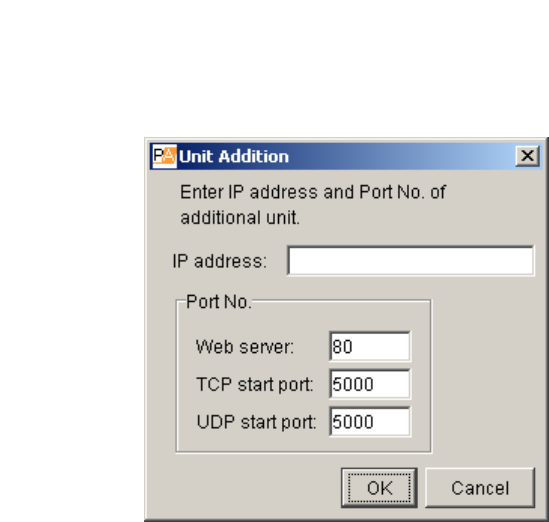
Step 4. Press the Add button.
A Unit Addition dialog is displayed.
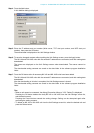
Step 5. Enter the IP address and port number (Web server, TCP start port number, and UDP start port
number), then press the OK button.
The entered data is displayed on the Unit Settings window.
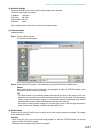
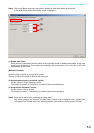
Step 6. To save the changed contents without quitting the Unit Settings screen, press the Apply button.
The NX-100 and NX-100S units with the entered IP addresses are connected, and their setting data
downloaded.
The names are displayed on the Unit Settings screen when downloaded. The names cannot be
edited.
The downloaded setting contents are saved to the data folder in the software program installation
folder.
Step 7. Press the OK button after all necessary NX-100 and NX-100S units have been added.
The NX-100 and NX-100S units with the entered IP addresses are connected, and their setting data
downloaded.
After the downloading of all units is completed, the Unit Settings screen is closed.
The downloaded setting contents are saved to the data folder in the software program installation
folder.
Tips
• When a unit cannot be connected, the dialog [Connection failure to "
XX
". Delete?] is displayed.
Pressing the OK button deletes the faulty NX-100 or NX-100S from the Unit Settings screen list,
and the data is saved.
Pressing the Cancel button cancels the setting change. Setting can be attempted again after
confirming the setting contents.
• To delete an NX-100 or NX-100S unit from the Unit Settings screen list, select the desired unit and
press the Delete button.