© Copyright 2012 TRENDnet. All Rights Reserved.
TRENDnet User’s Guide
TEW-MFP1
15
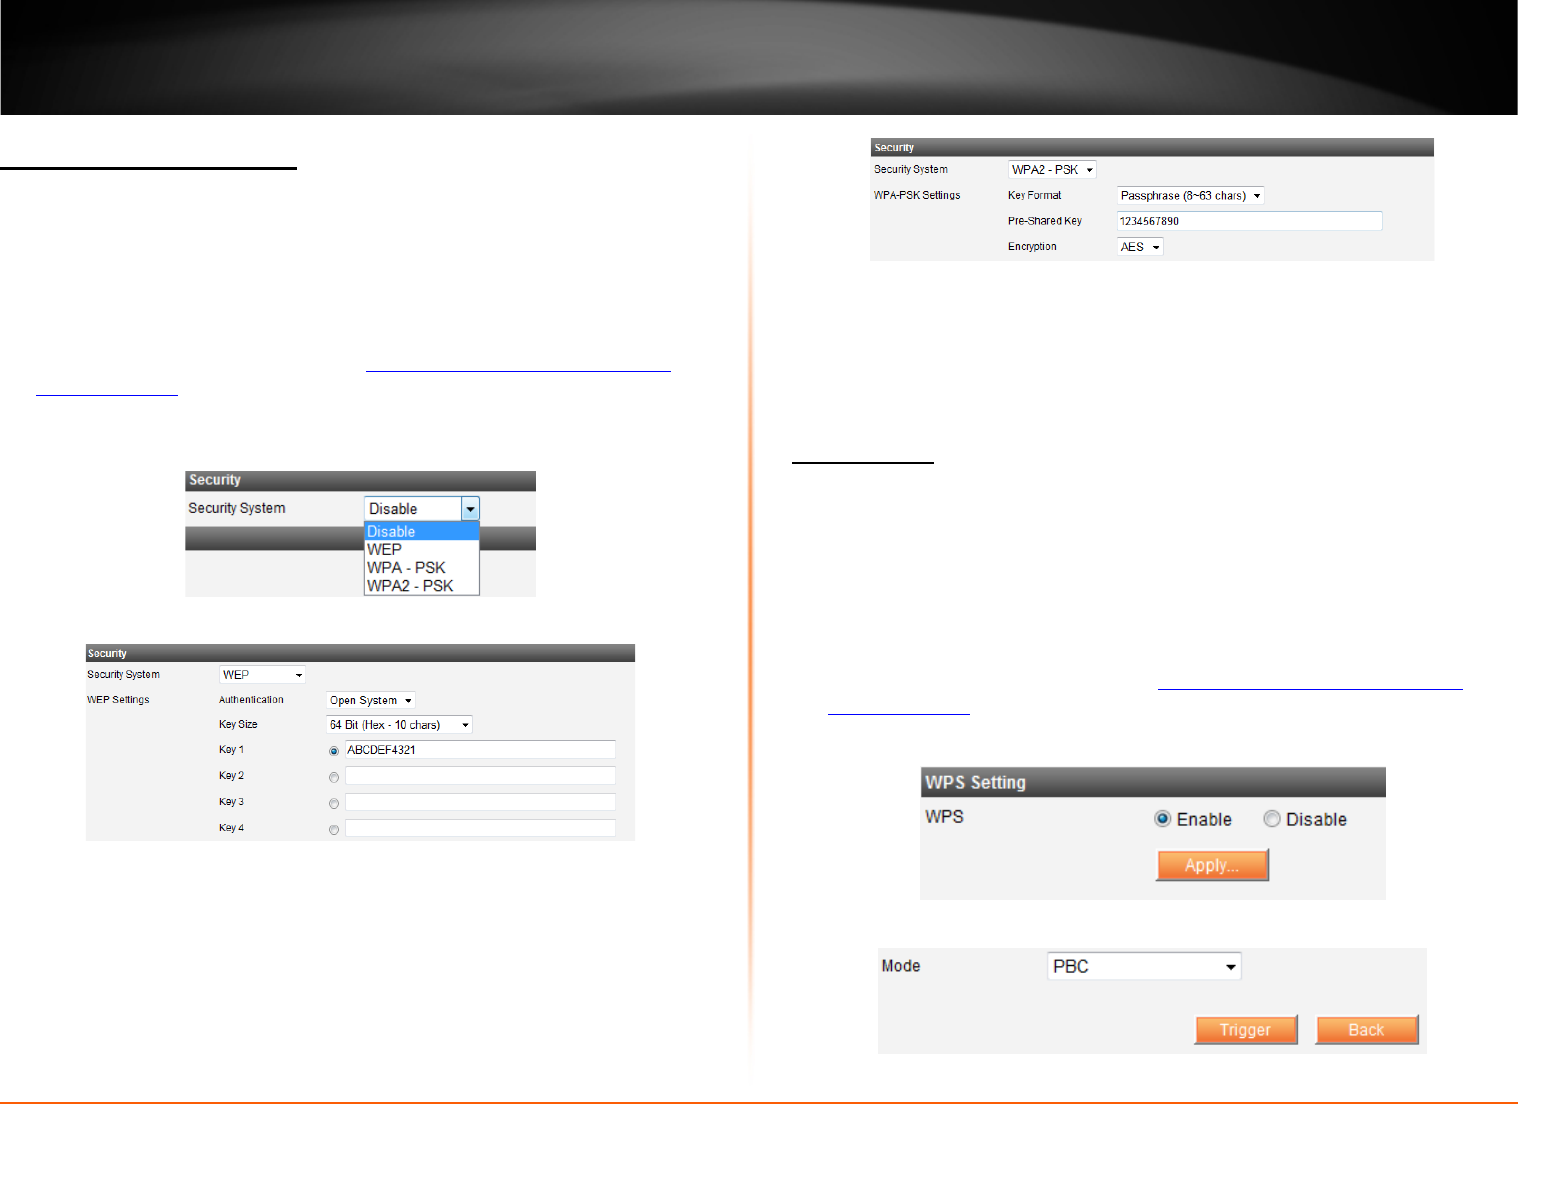
Wireless Security settings
Wireless
Similar to the previous section, you can change the wireless security settings of the
device when changes were made on your wireless network. The TEW-MFP1 supports
WEP, WPA-PSK and WPA2-PSK security types. WEP is the only security type that can be
used when the device is set to Ad-Hoc Network Type. Any changes applied to these
settings must match your wireless network. Incorrect settings may cause issues.
1. Log into your router management page (
see “Access your router management
page” on page 13).
2. Click on the Wireless tab and scroll down to the Security section.
3. Select the wireless security/encryption type applied on your wireless network under
Security System.
4. Enter your wireless network’s encryption information.
• WEP
o Authentication: Select the authentication type
o Key Size: Authentication Key Size
o Key: Selected and enter key set on your wireless network
• WPA-PSK or WPA2-PSK
o Key Format: Select the format type
o Pre-Shared Key: Enter the key or password
o Encryption: Selected encryption type set on your wireless network
5. Click Apply.
WPS Setting
General
Wi-Fi Protected Setup or WPS is a feature that allows the device to authenticate to your
wireless network, the TEW-MFP1 supports WPS Push Button and PIN Configuration.
When using WPS make sure your wireless router or access point supports these
features. The WPS Push Button Configuration or PBC can be initialized from a virtual
button following the steps below or from a physical button located on the side of the
unit. Please refer to Product Hardware Features section for more information.
1. Log into your router management page (
see “Access your router management
page” on page 13).
2. Click on Wireless tab and scroll down to the WPS Setting section.
3. Select Enable and click on Apply
4. Select the type of WPS Mode you would like to use.


