14
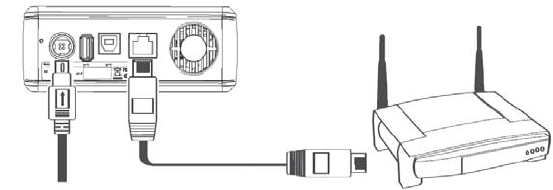
Connect the included Ethernet cable from the Ethernet
p
ort
4.
on t
h
e NAS
d
rive to an Et
h
ernet switc
h
(100 Base-T), a wire
d
or
w
ireless router, or a wireless access point.
Connect the included AC Adapter to the NAS drive, and then to a 5
.
w
a
ll
out
l
et.
Press the
O
N
/O
FF button on the
f
ront o
f
the NA
S
drive. The
6.
g
reen LED will come on to indicate that the unit is now
p
owered
o
n.
Wait for the NAS drive to boot u
p
and to auto-confi
g
ure its7.
connection on the network. Depending on your particular LAN
con
fi
g
uration and settin
g
s, this ma
y
take several minutes. The
followin
g
p
rotocols will be followed durin
g
auto-confi
g
uration:
DHCP client is enabled b
y
default. So
y
our router or a
.
ot
h
er LAN equipment t
h
at is provi
d
ing t
h
e DHCP
service will automaticall
y
assi
g
n an IP address to the
NAS
d
rive an
d
com
pl
ete t
h
e networ
k
connection.
If no DHCP server is available on
y
our isolated network,
b.
t
h
en t
h
e auto-negotiation process wi
ll
procee
d
in one
o
f
two wa
y
s, de
p
endin
g
on whether Bon
j
our
p
rotocol
is ena
bl
e
d
or
d
isa
bl
e
d
. Bon
j
our
p
rotoco
l
is
b
ui
l
t-in to
recent Mac OS X systems, an
d
can a
l
so
b
e optiona
ll
y
installed on Windows s
y
stems.
A
pp
le Bon
j
our
p
rotocol is enabled b
y
i.
default. So if
y
ou are connectin
g
to an
i
solated Bonjour-enabled network and
n
o DH
C
P server is
p
resent,
y
our NA
S


