20
The next screen allows
y
ou to assi
g
n this user to an existin
g
10
.
g
rou
p
. As described above, the initial factor
y
settin
g
p
rovides for
the de
f
ault group named “@guest-share”. When done with this
form,
p
ress
Ne
x
t
to continue
.
The fi nal screen for addin
g
a user allows
y
ou to assi
g
n access 11
.
p
rivileges to currently defi ned shares. Of course, if you checked
“
Create Private Folder” in step (9), then read/write access has
automaticall
y
been
p
rovided to this user’s
p
rivate folder.
Thou
g
h the initial factor
y
settin
g
p
rovides for three default shares
(admin, guest-share, and public), only “public” is available
f
or
se
l
ec
ti
o
n
fo
r
access
t
o
n
e
w
use
r
accou
nt
s
.
When done with this
f
orm, press
C
omplete
.
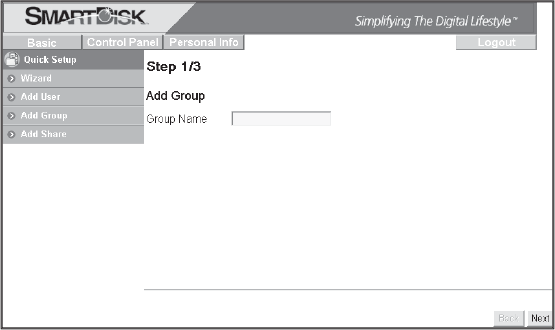
Add
New Grou
p
Next
y
ou ma
y
o
p
tionall
y
setu
p
a new
g
rou
p
. If
y
ou do not want to12
.
set u
p
a
g
rou
p
at t
h
is time,
y
ou ma
y
j
um
p
a
h
ea
d
to Ste
p
15
.
Be
g
in
g
rou
p
setu
p
by
se
l
ectin
g
t
h
e Quic
k
Setu
p
/ A
dd
Grou
p
button.
Fill in the initial screen with your group’s name. The group name
must be lower-case and ma
y
be a maximum of 20 al
p
hanumeric
c
h
aracters, wit
h
out spaces. T
h
e group name must
b
egin wit
h
an
alphabetic character. Press
Ne
x
t
to cont
i
nue.


