User Guide 19
How are problems identified and reported?
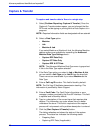
Transfer
The Transfer utility enables your site operator to transmit
previously captured data as described in the topic, Capture.
There are several different ways to transfer captured data. Data
may be transferred directly to:
• Xerox Support Server
• FTP site
• CD writer
NOTE: The destination is set via the Problem Reporting: Settings
page: Transfer tab.
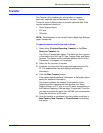
To transfer machine and/or job data to Xerox
1. Select either [Problem Reporting: Transfer] or the [Files
Ready for Transfer] link.
The Files to Transfer table opens. This table has four columns
of information–the Call Log ID, Type, Capture Date, and Status
columns. The Status column indicates whether the file is Not
Transferred, In-Progress, or Completed.
2. Select the file you want to transfer.
3. If desired, you may click the arrow positioned before the File
ID. This expands the view and displays additional file
information.
4. Click the [Start Transfer] button.
If the system needs additional information, a dialog box opens
asking for additional information.
The system validates the transfer ID provided by Xerox
Support and then transfers the files to either your Xerox
Support Server, an FTP site, or to a CD writer as specified on
the Problem Reporting: Settings page: Transfer tab. If the files
you want to transfer are more than 400 MB, you are prompted
to transfer the files to a CD writer.
5. Once the transfer is completed, you can choose to perform a
New Capture, New Transfer or Close Window by selecting
that option.


