Setting Up Your Printer
2.
7
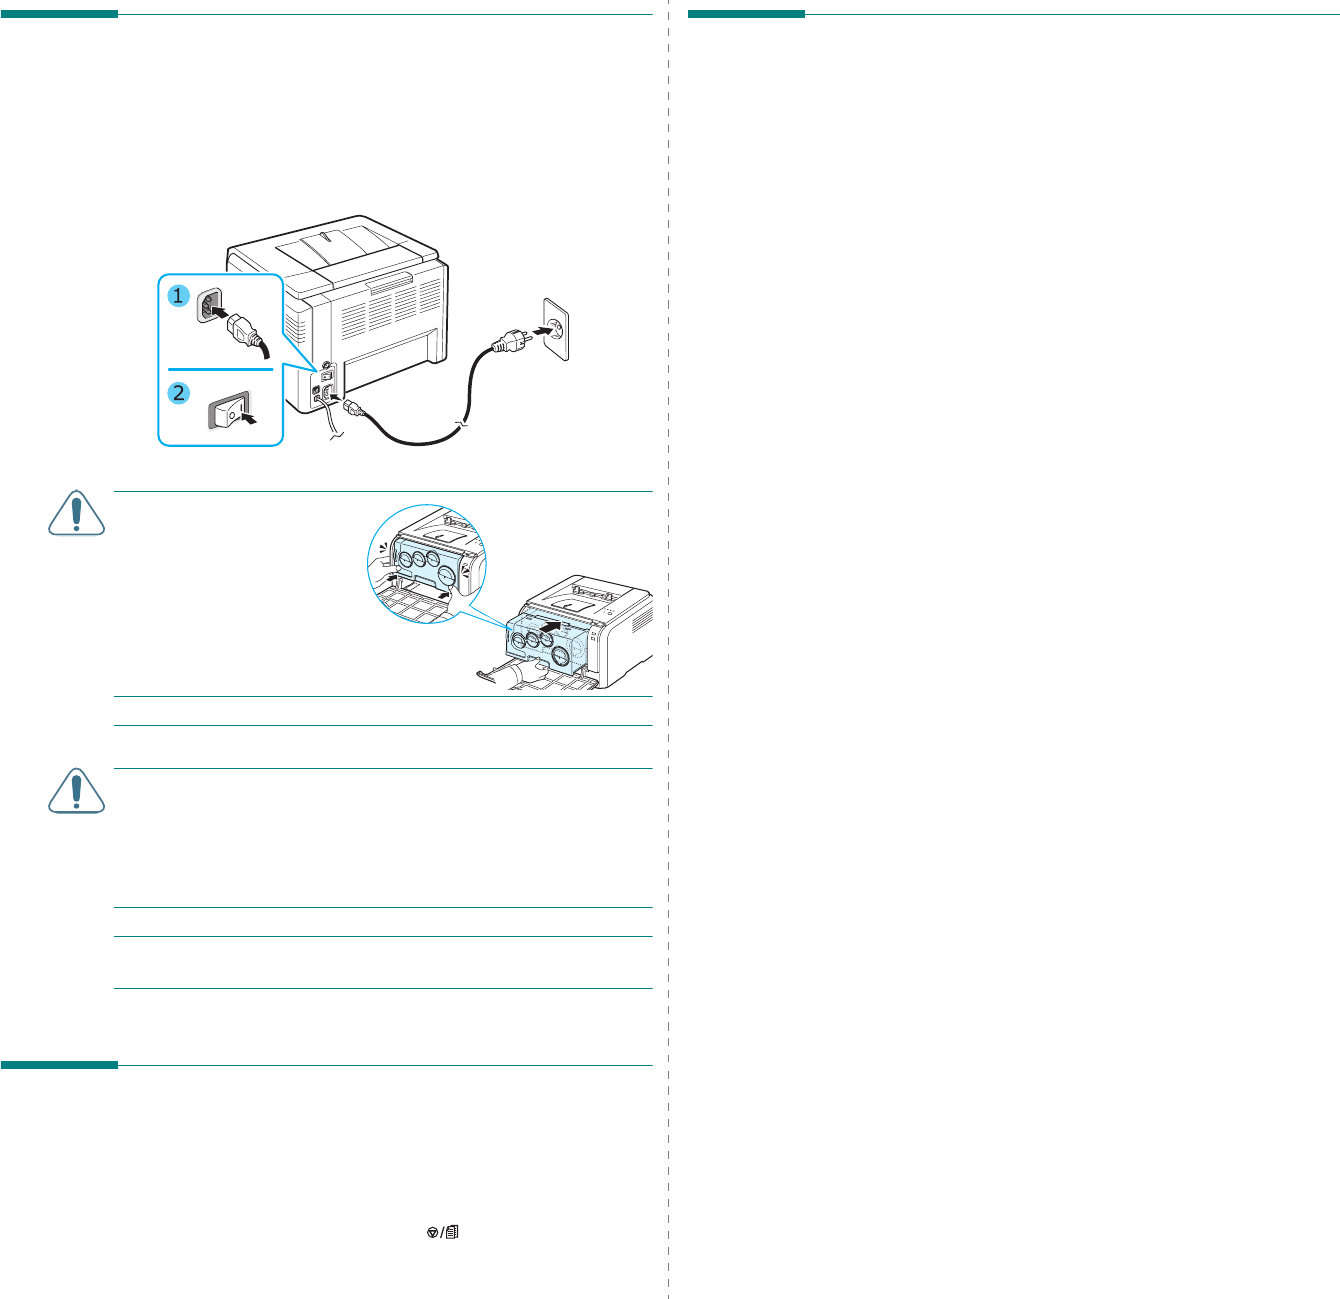
Turning the Printer On
1
Plug the power cord into the power receptacle on the rear
of the printer.
2
Plug the other end into a properly grounded AC outlet and
turn on the power.
CAUTION:
If there is a
cracking sound, re-install
the imaging unit. The
imaging unit is not
properly installed.
CAUTION
:
• Some parts inside the printer may be hot when power is on,
or after printing. Be careful not to burn yourself when
working inside the printer.
• Do not disassemble the printer when it is turned on or
plugged in. Doing so may give you an electric shock.
NOTE
: Each LED blinks red in a repeated order. Wait for about
1.5 minutes for the printer to get ready.
Printing a Demo Page
Print a demo page to make sure that the printer is operating
correctly.
To print a demo page:
In Ready mode, press and hold the button for 2 seconds.
A demo page showing the printer’s features and capabilities is
printed.
Installing the Printer Software
You must install software using the supplied
printer driver CD after you have set up your
printer and connected it to your computer. For
details, see the Software Section.
The printer driver CD provides you with the following software:
Programs for Windows
You can install the following printer software using the printer
driver CD.
•
Printer driver
for Windows. Use this driver to take full
advantage of your printer’s features. See the
Software
Section
for details about installing the Xerox printer driver.
•
Status Monitor
. Appears when printing errors occur. See
the
Software Section
for details about installing the Status
Monitor program.
•
Printer Settings Utility
. you can configure print settings.
Macintosh Printer Driver
You can print from a Macintosh with your printer. Go to the
Software Section
for information about installing the print
software and printing from a Macintosh.
Linux Driver
You can print from a Linux-based computer with your printer.
Go to the
Software Section
for information about installing
the Linux driver and printing from a Linux environment.
