PCI-X v5.1 165 Getting Started Guide www.xilinx.com 41
UG158 March 24, 2008
Xilinx XST
R
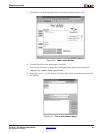
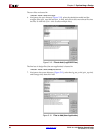
Note: if you run LeonardoSpectrum with the graphical user interface, the quick setup form cannot be
used to synthesize the design. Instead, choose File > Run Script from the menu.
The end result of the synthesis step is an EDIF file that is fed into the Xilinx implementation
tools during the implementation step.
In practice, the provided script file must be modified to accommodate other designs. To
provide insight into the synthesis script, the major steps are presented below:
1. Various synthesis options are set through the use of environment variables. These
must be present in the script, and should not be modified. The synthesis library is also
loaded; this may be altered for different devices and speed grades.
2. The design is loaded by reading in the design files. At this point, the top level module
is declared as the present_design. The script adds nopad attributes (with a value of
FALSE) to all PCI-X bus interface signals. The I/O structures for these ports are
directly instantiated in the wrapper file.
3. The optimization step is done with the -hierarchy preserve and the -chip
options. The -hierarchy preserve option prevents LeonardoSpectrum from
dissolving the design hierarchy. The -chip option indicates that automatic I/O buffer
insertion should be performed.
4. After synthesis is complete, the synthesized netlist is written out.
5. The tool may issue warnings about unused signals. These warnings are expected.
Xilinx XST
Before attempting to synthesize a design, ensure that the Xilinx XST environment is
properly configured. Synthesis is supported only from the XST command line.
1. Navigate to the synthesis directory:
cd <Install Path>/hdl/example/synthesis
The synthesis directory contains a script for use with Xilinx XST; this script is called
run_xst.bat for PC platforms and run_xst.sh for Unix platforms. Note that the
run_xst.cmd and run_xst.prj files are common and used by both scripts.
2. If required, modify the files as required to suit your application. You may need to
change the target architecture and select different wrapper and configuration files.
3. Synthesize the design by running the script.
The end result of the synthesis step is an NGC file, which is fed into the Xilinx
implementation tools during the implementation step. The tool may issue warnings about
unused signals; these warnings are expected.


