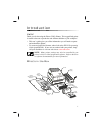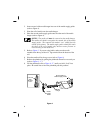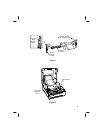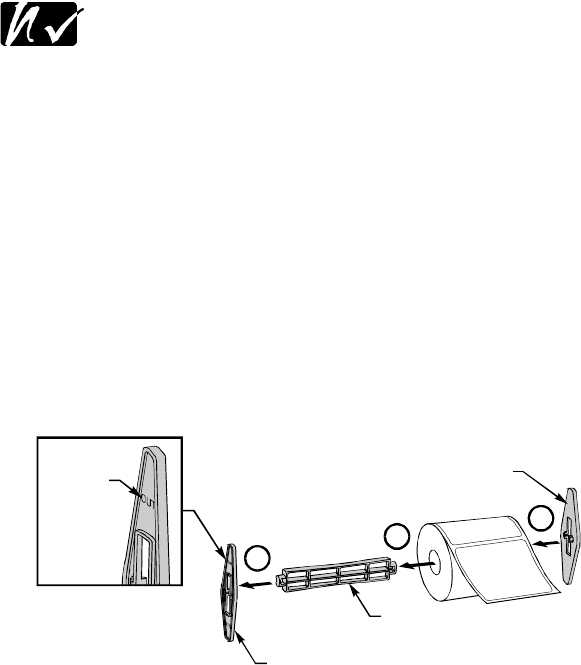
2. Insert one end of the media hanger into one of the media supply guides
(refer to Figure 4).
3. Place the roll of media onto the media hanger.
4. Place the second media supply guide onto the other end of the media
hanger (refer to Figure 4).
NOTES: The media roll must be centered on the media hanger.
The media roll should rest against the smooth side of the media
supply guides. The textured side marked “out” should face the
outside of the printer. The media supply guides should just touch
the edges of the roll of media; they must not cause pressure or
excessive drag on the media roll.
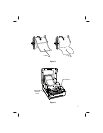
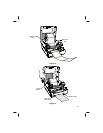
5. Refer to Figure 5. If you are using labels, make sure the media
unwinds from the top of the roll. Tags unwind from the bottom of the
roll.
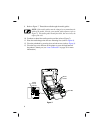
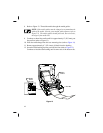
6. Place the media roll in the top cover (refer to Figure 6).
7. Release the printhead by pulling the printhead release lever toward you
(refer to Figure 6, “1”).
8. Lift the printhead (refer to Figure 6, “2”) until you feel it “lock” into
place. Be careful not to force the printhead past this position!
6
1
2
3
Smooth Side of
Media Supply Guide
Media
Hanger
Media
Supply
Guide
Textured
Side
Marked
"OUT"
Figure 4


