


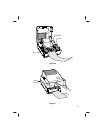
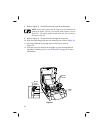
Loading the Ribbon
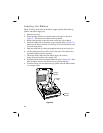
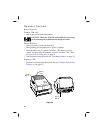
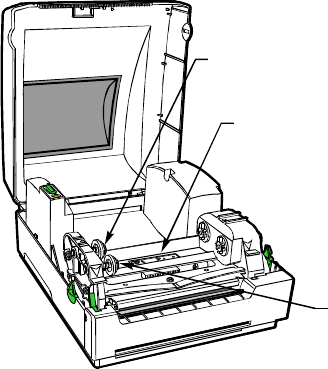
Figure 26 shows the location of the ribbon supply spindle, ribbon take-up
spindle, and ribbon supply slot.
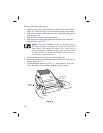
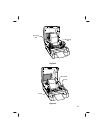
1. Open the top cover.
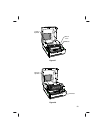
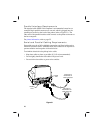
2. Install an empty ribbon core (notched end to the right) as shown in
Figure 27. This becomes the ribbon take-up spindle.
3. Remove the tape that secures the leader on the new roll of ribbon.
4. Install the ribbon roll on the ribbon supply spindle (refer to Figure 27).
Make sure the ribbon unwinds over the top of the roll and feeds toward
the back of the printer.
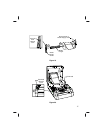
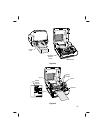
5. Open the printhead by pulling the printhead release lever toward you.
6. Lift the printhead until you feel it “lock” into place. Be careful not to
force the printhead past this position!
7. Thread the ribbon leader into the ribbon supply slot (refer to
Figure 26 for the location of the supply slot).
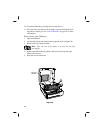
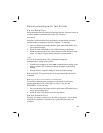
8. Wrap the ribbon leader around the printhead (refer to Figure 28). Then,
affix the ribbon leader to the ribbon take-up spindle with tape.
9. Wind the ribbon onto the ribbon take-up spindle until the ribbon leader
is no longer visible.
22
Supply
Spindle
Supply
Slot
Take-Up
Spindle
Figure 26