


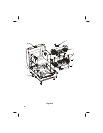
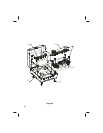
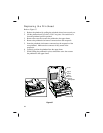
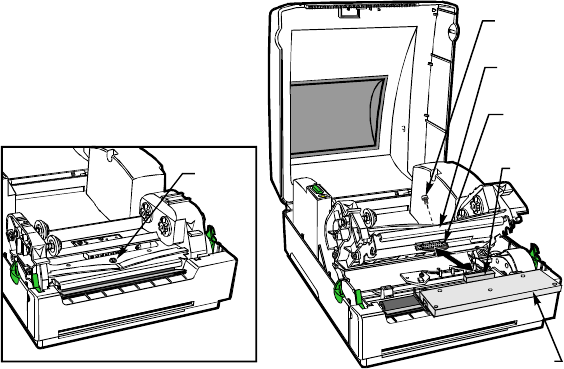
Replacing the Printhead
Refer to Figure 37.
1. Release the printhead by pulling the printhead release lever toward you.
2. Lift the printhead until you feel it “lock” into place. Be careful not to
force the printhead past this position!
3. Remove the screw that secures the printhead to the upper frame.
4. Remove the printhead wire harness connector from the receptacle.
5. Insert the printhead wire harness connector into the receptacle of the
new printhead. Make sure the connector is fully seated in the
receptacle.
6. Correctly position the printhead into the upper frame.
7. While holding the printhead in place, reinstall the screw that secures
the printhead to the upper frame.
44
Upper
Frame
Receptacle
Wire
Harness
Connector
Printhead
Screw
Screw
Figure 37