


DUA1640-5AAA02
Installing Quick Config Manager and the Load Balancing Tool B-3
Installation
Procedure
Quick Config Manager can be installed on its own or onto a
workstation that already has other Transcend management applications
installed.
CAUTION:
Do not install Quick Config Manager in the same directory
as any previously installed Transcend management applications. Quick
Config Manager and the Load Balancing Tool are installed in
subdirectories (QCM and LOADBAL) under the default directory of
C:\TRANSCND. You can change the default directory during installation
if required.
If you have an earlier version of Quick Config Manager on your system,
you can simply install this version over it.
The installation program is a standard Windows based installation.
To install Quick Config Manager:
1
Start Microsoft Windows.
If you already have an existing Transcend management application
running, ensure that it is closed down.
2
Insert the CD-ROM into your CD-ROM drive.
3
Depending on your version of Windows:
■
Select
Run
from the
Start
menu — Windows ‘95 and Windows NT
(version 4 or later).
■
Select
Run
from the
File
menu — other versions of Windows.
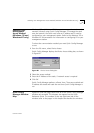
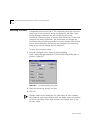
4
In the
Run
dialog box, type
drive
:\TRANSCND\QCM\SETUP
(where
drive
is the letter of your CD-ROM drive) and click
OK
.
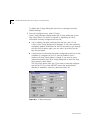
The installation program starts and checks your system configuration.
Choose which installation you want and enter any information that’s
requested. The installation program reports when installation is
complete.
When the Quick Config Manager installation is complete, it has its own
program group called Transcend. If other Transcend management
applications are present, the existing Transcend program group now
includes Quick Config Manager.