17
Powering Up the Gateway
1 Plug the power adapter into the power adapter socket located
on the back panel of the Gateway (refer to “
Power Adapter
socket” on page 13).
2 Plug the power adapter into a standard electrical wall socket.
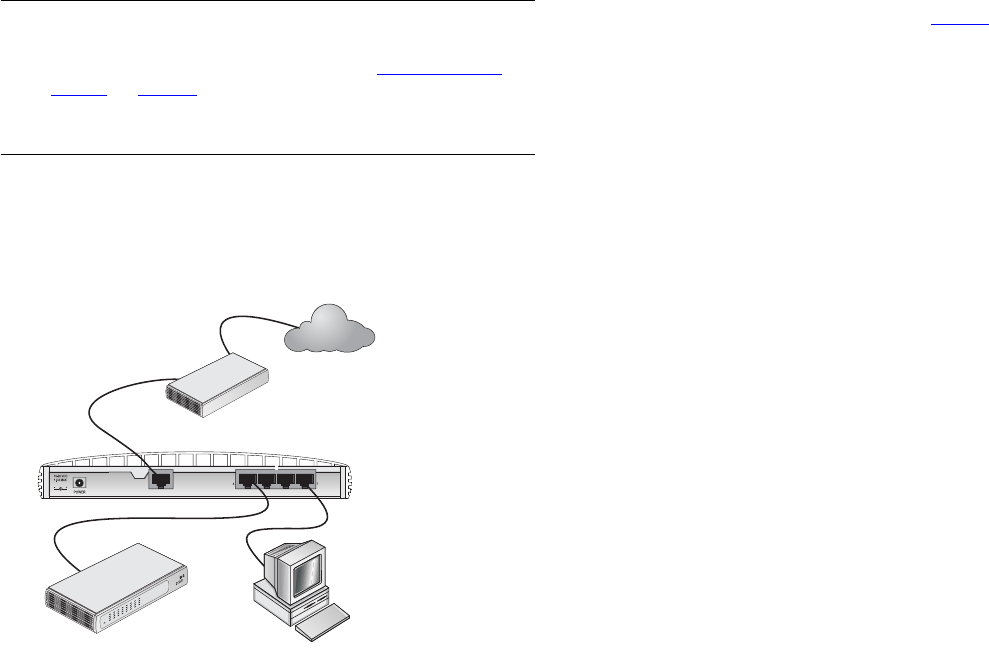
Connecting the Cable/DSL Secure Gateway
The first step for installing your Cable/DSL Secure Gateway is to
physically connect it to a cable or DSL modem in order to be able
to access the Internet.
Figure 5 Connecting the Cable/DSL Secure Gateway
To use your Cable/DSL Secure Gateway to connect to the Internet
through an external cable or DSL modem (Figure 5
):
1 Use the supplied cable to connect the Gateway's Ethernet
Cable/DSL port to your Cable/DSL modem. Ensure that your
modem is connected to the Internet and switched on.
2 Connect your computer to one of the 10/100 LAN ports on the
Gateway.
3 Connect the power adaptor to the Gateway and wait for the
Alert LED to stop flashing. Check that the Cable/DSL Status LED
is illuminated.
4 Switch on your computer. Once your computer is ready to use,
check that the LAN Port Status LED on the Gateway is
illuminated.
You have now completed the hardware installation of your
Gateway. You now need to set up your computers so that they
can make use of the Gateway to communicate with the Internet.
Ethernet
Cable/
DSL
5
LAN
Internet
Your existing
Cable/DSL
Modem
OfficeConnect
Cable/DSL
Secure
Gateway
OfficeConnect
Switch
dua08 569-5aaa02.book Pag e 17 Thursday , Novem ber 7 , 2002 3:09 PM


