


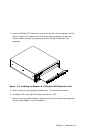
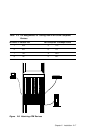


Connecting Devices to the ATM Ports
You can connect devices to the ATM ports either through the building wiring or by a
direct connection.
Via Building Wiring
To connect an ATM device via building wiring, follow the steps listed below.
Note: This procedure begins with the cabling of the ATM device (such as a 25.6-Mbps
ATM adapter installed in a workstation) to the building faceplate; then it describes
connecting the ONcore switching hub or CELLplex 4000 to the patch panel in the wiring
closet.
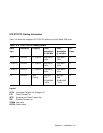
1 Look at the cabling chart, which your network planner provided, to determine
how the ONcore switching hub or CELLplex 4000 should be connected to the
network.
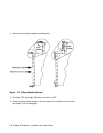
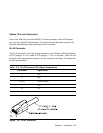
2 In the work area, connect one end of a straight-through cable (with
ATM-compliant pin assigments) to the ATM connector on the device and the
other end to the ATM connector on the faceplate where the building wiring
terminates.
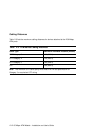
3 Label the faceplate if it does not already have a cable label. Follow your
enterprise’s procedures for cable labeling. If there is more than one wiring
closet on a floor, record on the same line, the wiring closet identifier or
location and the cable identifier.
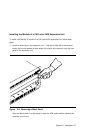
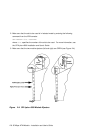
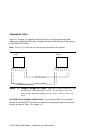
4 In the wiring closet, connect the cable that originated at the ATM device to
the appropriate connector on the patch panel or other equipment where the
building wiring terminates. Connect the other end of the cable to an ATM
port on the 6412M-25-TP module.
5 Label the connector on the patch panel (or other equipment used to
terminate the building wiring).
Chapter 2. Installation 2-13