


62 User's Guide
Driver Installation
♦ Windows needs to be running.
♦ Insert the appropriate printer driver diskette into the floppy disk drive.
1. Click the “Start” button.
2. Select “Settings”, then “Printers”
3. Double click the “Add Printer” icon.
4. At the Add Printer Wizard, Click “Next”.
5. Specify the “Network” or “Local” button and click the “Next” button.
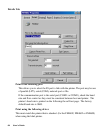
6. Select “Installation from Floppy Disk” or "Have Disk".
7. Enter the floppy drive and path.
A:\WIN95 A:\NT40
A:\WIN98 A:\WIN2000
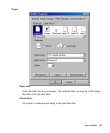
8. Select the printer name to be installed on the “List of Printers”, window. Click “Next”.
9. Select the communication port for the label printer. For parallel port, select “LPT1:”,
“LPT2:” or “LPT3”, for serial port select “COM1:” or “COM2:”., Click "Next".
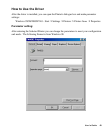
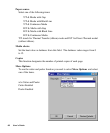
10. You may wish to change the Printer Name to be more descriptive. Also select this
printer as the Default printer. Click "Next".
11. Select whether you want a test page to be printed, then click on Finish.
12. After the related files have been copied to your system, the procedure is complete.
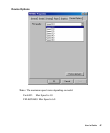
Notes:
1. If you are just updating your driver, make sure to delete the previous version first.
2. If you install new bar code application software like BarTender, LabelView or
CodeSoft, the driver should be activated and set as the current printer driver.