


Radia Lighting System Configuration Pages
36
RE-DM4 and RE-DM6 RADIA Eclipse Dimmer Modules
To create a new preset:
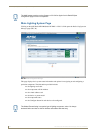
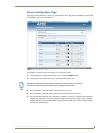
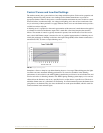
1. Scroll to the bottom of the Device Configuration page and click the Add Preset button (FIG. 35).
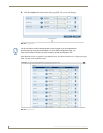
2. Enter a name for the new preset in the Label field.
3. Enter a time (0-255) in the Preset Time field. If you do not add a time, a default value of "1" will be
entered.
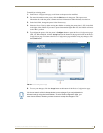
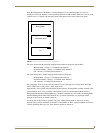
4. Click the Configure button to open the New Preset Configuration page (FIG. 34).
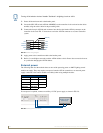
5. Click a desired lighting component in the Available field to highlight it. To move an individual
lighting component into the Stored field, click the ">" button. To move a previously selected
lighting component back to the Available field, click on it in the Stored field and then click the "<"
button. To move all of the lighting components from the Available field to the Stored field, highlight
one component and click the ">>" button. Reverse the process and click the "<<" button to return all
lighting components to the Available field.
6. Clicking the Recall button will recall the preset and the Tweak button will refresh and auto-save the
preset with the current load levels. The Recall and Tweak buttons are only enabled for existing and
saved presets; neither button will be enabled for a new preset that has not been saved.
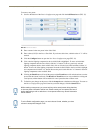
7. To finalize your changes to the preset, click the Accept button at the bottom of the page. To return to
the Device Configuration page and cancel any unsaved changes, click the Cancel button.
FIG. 35 New Preset button
While creating a new preset, you cannot edit any other saved preset during that time,
or the new preset information will be lost. Please create your new preset and save it
before attempting to edit or add others. A new preset without any stored information
will be deleted.
To exit a Radia configuration page, you must choose Cancel, whether you have
chosen to accept the changes or not.