


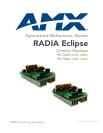


Radia Eclipse RE-DM4 Dimmer Module
3
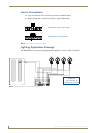
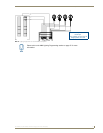
RE-DM4 and RE-DM6 RADIA Eclipse Dimmer Modules
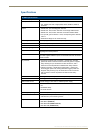
Suggested Loads
Caution: Pre-Installation Notes
All Class 1 and 2 wiring must be connected to their dedicated terminals.
Class 1 wiring should be connected through the top of the enclosure, and Class 2 wiring
through the bottom.
Load conductors must be same size as line conductors, regardless of
connected load.
Disconnect power while installing or connecting the unit.
Keep top and bottom air vents clear at all times, and maintain 12” (30.48 cm) clearance around
the top and bottom.
Test loads for shorts before connecting.
Class 2 wiring must be rated 300V or higher.
For indoor use only.
AC lighting loads only.
This module may require extra power from the AXLink connection or an external power
supply connected to the control card.
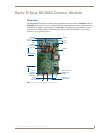
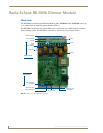
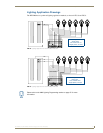
RE-DM4 4-pin module connector (male)
The 4-pin male module connector for the RE-DM4 is illustrated in FIG. 2.
Dimmed Switched
Incandescent Motors
Neon, cold-cathode Fans
This unit should be installed only by qualified electrical personnel, and in compliance
with all national electrical codes, local codes and ordinances.To prevent possible
personal injury or death, disconnect power to the enclosure at the breaker box
before attempting to work with any AMX Lighting modules.
FIG. 2 4-pin Male Module Connector for the RE-DM4
Pin 4 (GND)
Pin 3 (RLY)
Pin 2 (DIM)
Pin 1 (+12 V)