


28 - PowerBook G4 (12-inch) Take Apart
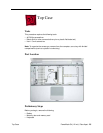
Top Case
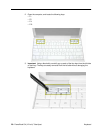
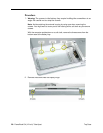
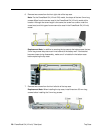
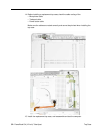
6. Remove two screws from the front right side of the top case.
Note: For the PowerBook G4 (12-inch DVI) model, the shape of the two 3-mm long
screws differs from the screws used in the PowerBook G4 (12-inch) model at this
location. Although the screw length is the same; the screw has a collar under the
screw head, and this type of screw cannot be used in the PowerBook G4 (12-inch)
model.
Replacement Note: In addition to securing the top case to the bottom case, the two
3-mm long screws help secure an inner bracket to the battery well. If the bracket
becomes loose during disassembly, make sure it is installed in the bottom case
before replacing the top case.
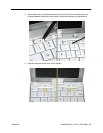
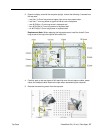
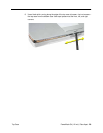
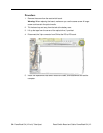
7. Remove two screws from the front left side of the top case.
Replacement Note: When installing the top case, install these two 5.5-mm long
screws before installing the 3-mm long screws.