


Mounting Xserve RAID in a Rack 33
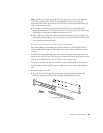
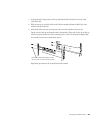
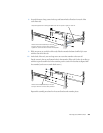
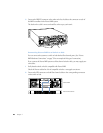
8 Securely fasten two long screws in the top and bottom holes of bracket A on each of the
rack’s front rails.
9 With one person on each side of the rack, slide the extender backward until its lip is even
with the rear rail of the rack.
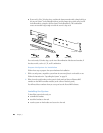
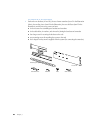
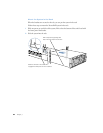
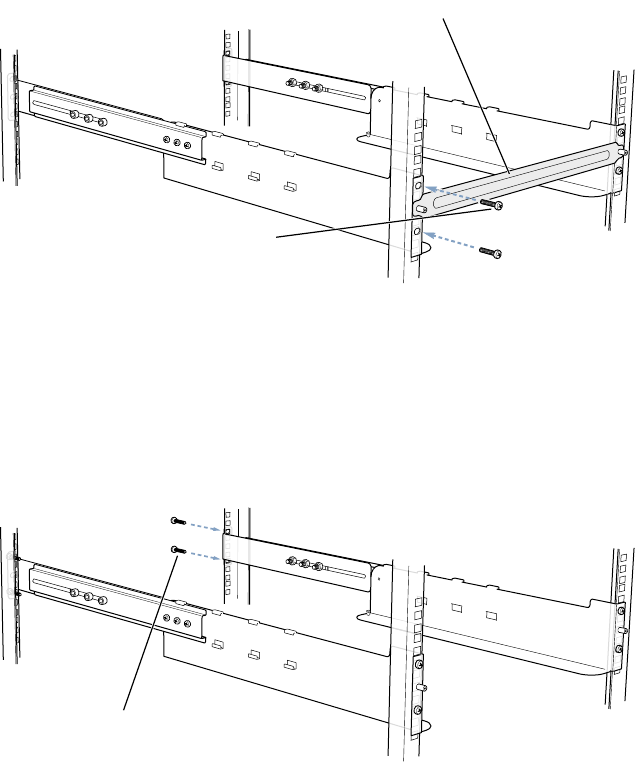
10 At the back of the rack, use two long screws to secure the extender to the rear rail.
Put the screws in the top and bottom holes in the extender. (If the rack’s holes do not line up
with the top and bottom holes in the extender, put the screws in holes that are aligned with
the extender, but be sure to attach both screws.)
Repeat this assembly procedure for the second bracket and extender pieces.
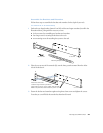
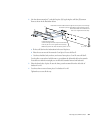
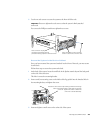
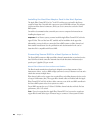
Attach each bracket assembly to the front
rack post with two of the screws provided.
Tighten the screws and then remove the template.
Temporarily place the mounting template over the two posts on parts A1 and A2.
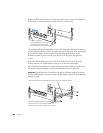
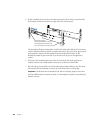
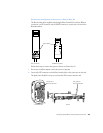
Attach each bracket assembly to the rear
rack post with two of the screws provided.