


Installing or Replacing Components 51
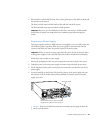
4 If the handle is not flush with the front of the system, gently press it. If it still is not flush, pull
the module out and reseat it.
The drive isn’t fully seated until the handle is flush with the front of the system.
The disk status light turns green to indicate normal operation.
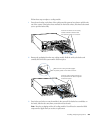
Important Be sure to save the blank drive module if you removed one. A blank module
should always be placed in an empty drive bay to maintain proper airflow through the
system.
Replacing a Power Supply
Each power supply in the Xserve RAID system is hot-swappable, so you can safely replace the
unit while the system is operating. When one power supply has been removed from the
system (or has failed), the other one provides power for the entire system.
Follow these steps to replace a power supply.
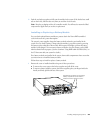
1 Remove the packaging from the new power supply and set it near the back of the system.
2 Unplug the power cord on the power supply you want to replace from the power source.
3 Lift the clip that holds the power cord in place, then remove the cord from the back of the
power supply.
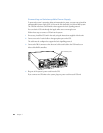
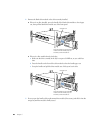
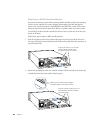
4 Locate the small tab on the left side of the handle at the top of the power supply and press
this tab down. Fold the handle down and then pull firmly outward to remove the power
supply. Set it aside.
Important When you remove a power supply from the system, be sure to replace it with a
working power supply as soon as possible to prevent the drive modules from overheating.
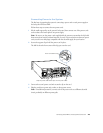
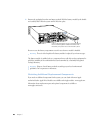
Pull the handle down to unlatch the power
supply and then pull the power supply out.
Tab under handle
Warning Do not reach inside the system when removing a power supply or when the
unit is out of the system.