


Chapter 3 Using Your PowerBook 49
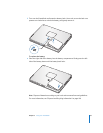
2 When the disc icon appears on the desktop, the disc is ready to use.
Ejecting a Disc
To eject a disc, do one of the following:
 Drag the disc icon to the Trash.
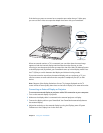
 Press and hold the Media Eject key (C) on the keyboard until the disc ejects.
Allow the disc to fully eject before removing or reinserting it.
If you can’t eject the disc, quit any applications that might be using the disc and try
again. If that doesn’t work, restart the computer while holding down the trackpad
button.
Playing DVDs
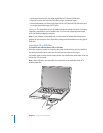
To play a DVD-Video disc on your PowerBook, insert the DVD. DVD Player opens
automatically. You’ll find DVD Player provides easy-to-use controls for starting,
stopping, and viewing DVDs.
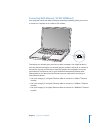
If your PowerBook is connected to a TV so that you can watch a DVD-Video on the TV
screen, select 720 x 480 NTSC (in the United States) or 720 x 576 PAL (in Europe and
other regions) in the Displays pane of System Preferences.
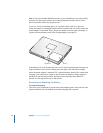
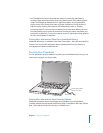
You can easily connect your PowerBook to your stereo system. Use a miniplug-to-RCA
cable (not included) to connect the headphone port (f) on your PowerBook to the
audio input ports on your stereo.
Recording CD-R and CD-RW Discs
Your PowerBook can record data to CD-R and CD-RW discs.
To record data on a CD-R or CD-RW disc:
1 Insert a blank disc into the optical drive.
2 In the dialog that appears, enter a name for the disc. An icon for the disc appears on
the desktop.
3 Drag files and folders to the disc icon.
4 Click the Burn Disc icon beside the disc name in the Finder sidebar.
You can also record music on CD-R or CD-RW discs right from your iTunes library.