


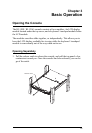

KL1508 / KL1516 User Manual
14
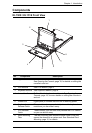
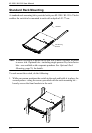
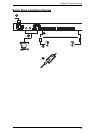
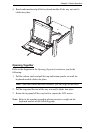
Single Stage Installation
In a Single Stage installation, there are no additional switches daisy chained
down from the first unit. To set up a single stage installation, refer to the
installation diagrams beginning onthe following page (the numbers in the
diagram correspond to the numbers of the installation steps), and do the
following:
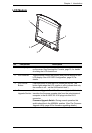
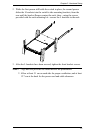
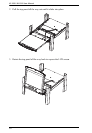
1. If you choose to install an external console, plug your keyboard, monitor,
and mouse into the Console Ports located on the switch’s rear panel. The
ports are color coded and marked with an icon to identify themselves.
Note: This step is optional.
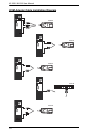
2. For each of the computers you are installing, use Cat 5 cable to connect
any available KVM port to a KVM adapter cable that is appropriate for the
computer you are installing. (See KVM Adapter Cables, page 5, for
adapter cable details.)
Note: The maximum supported distance to the adapter cable is 40 m.
3. Connect the KVM Adapter cable to the computer. Refer to the KVM
Adapter Cable Installation Diagram, page 16, to plug the adapter cable
connectors into their respective ports on the computers you are installing.
4. Connect the power cord to the switch and to an AC power source.
After you are all cabled up, you can power on the switch. After the switch is
powered on, power on the computers.