


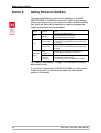

Adding Printers in NetWare
AXIS 5500 / AXIS 5550 User’s Manual 47
Setup using NDPS
The AXIS 5500/AXIS 5550 supports Novell Distributed Print Services
(NDPS). You can run NDPS over Pure IP (TCP/IP) or IPX/SPX.
Before the AXIS 5500/AXIS 5550 can be installed, make sure that NDPS
is installed and a Broker is loaded on your NetWare file server.
Axis Network Print Server uses the AXIS NDPS Gateway for printing in
networks using either IP or IPX as transport protocols. The printer
gateways are included with the NDPS software (from version 5.1 and up)
and are automatically installed together with NDPS.
Installing the Axis
Network Print Server
in the NDPS
environments
Having assigned an IP address to the AXIS 5500/AXIS 5550 as described
in Assigning an IP Address to the Print Server, on page 15, you are now
ready to install the Axis Network Print Server for NDPS printing. You can
select to install the connected printers as public or controlled access
printers. Follow the instructions below to install the Axis Network Print
Server using NDPS:
Important:
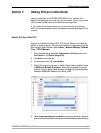
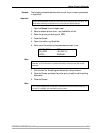
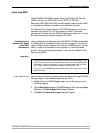
Public Access Printers Follow these instructions to create a public access printer using the NDPS
Manager object in your NetWare administrator utility:
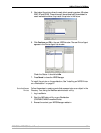
1. Double-click on the NDPS Manager object you will be using to control
the Printer Agents.
2. On the Identification page for the NDPS Manager, click the printer Agent
List button. The Printer Agent List dialog will appear.
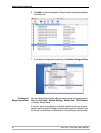
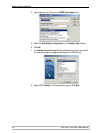
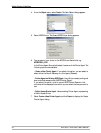
3. Click New. The Create Printer Agent dialog will appear.
• The NDPS Enabled parameter of the Axis Network Print Server is by default enabled. It must
be set to Yes in order for the communication between the print server and the NDPS gateway
to be enabled. To change this parameter, log in to the print server’s Web pages and choose:
Admin | Network Settings | Detailed View | NetWare=> NDPS Enabled => Yes.
• If you do not have an NDPS Manager object available, start out with creating one in the Net-
Ware Administrator.