5. Physical installation
4X
B
A
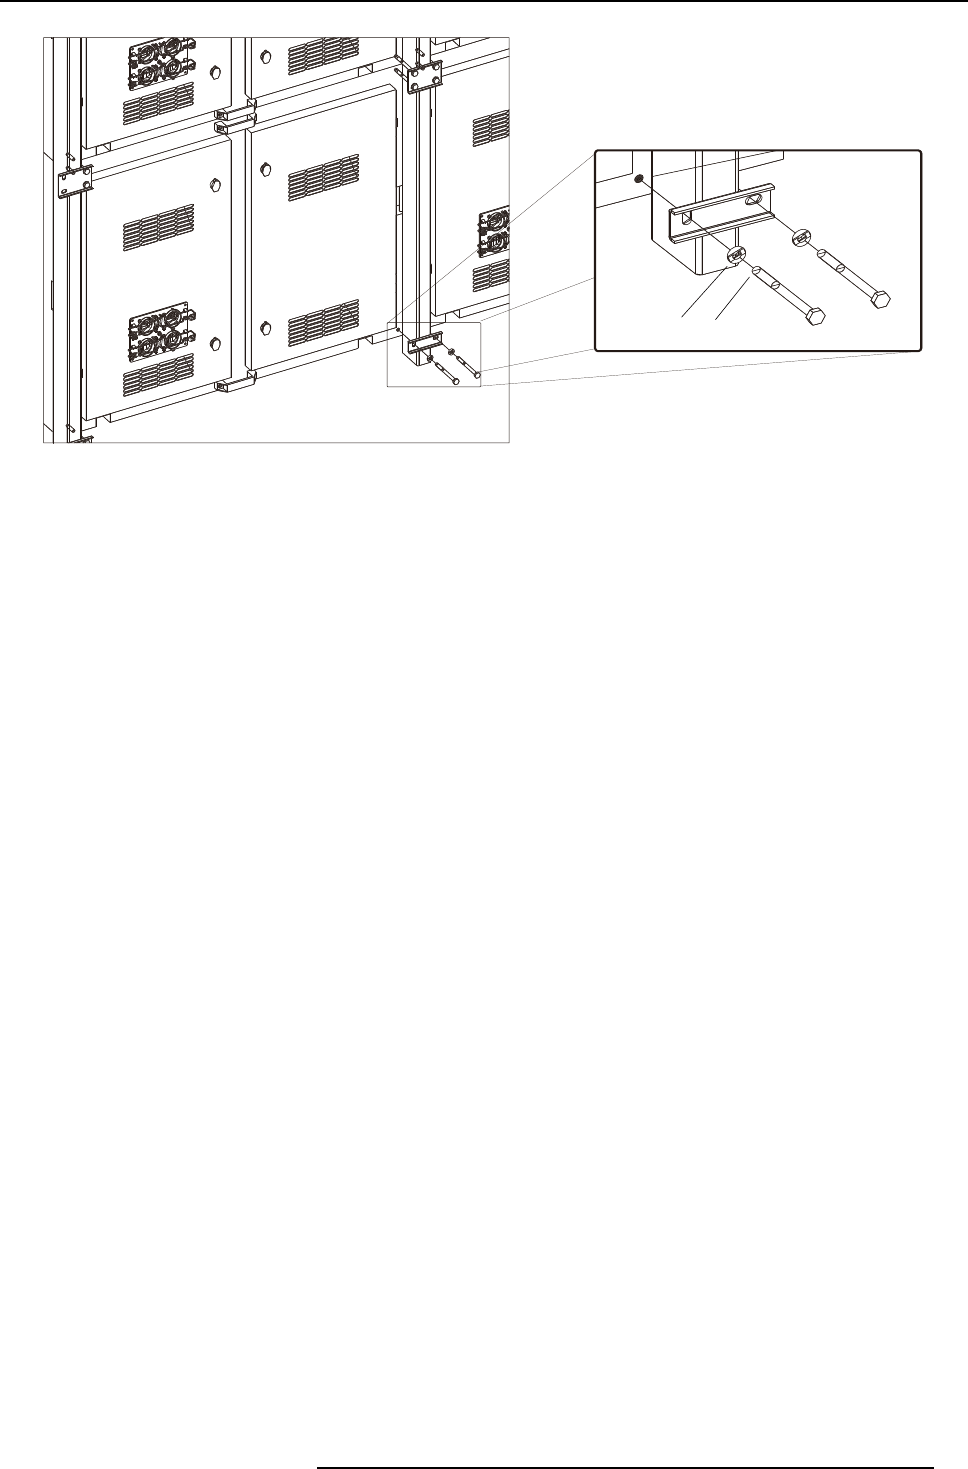
Image 5-5
4. Place a prevailing torque for the bolt (reference A) with the washer (reference B ) on each insert nuts of tiles. Do not fasten yet.
5. Level out the SF-10V tile. Use the adjust block in the bottom of tile for the height alignment;
Tip: For maximum adjustment space in horizontal direction place the hex cap bolts of the every first SF-10V tile that is placed
on the mounting plate in the middle of the corresponding slots.
6. Fasten the SF-10V tile. At least one person at the front keeps the SF-10V tile steady until the tile is completely fasten.
7. Release the adjust block.
R59770542 SF-10V DISPLAY 10/02/2012
35


