


76
After replacing the ink cartridge, check
the print quality. If the problem still
exists, repeat the cleaning and test print
procedures at least five times for the
new ink cartridge. If ink is still missing,
call your Brother dealer.
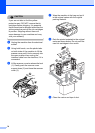
CAUTION
DO NOT touch the print head. Touching the
print head may cause permanent damage
and may void the print head's warranty.
Note
Checking the printing
alignment B
You may need to adjust the printing
alignment if after transporting the machine
your printed text becomes blurred or images
become faded.
a Press Ink Management.
b Press a or b to choose Test Print.
Press OK.
c Press a or b to choose Alignment.
Press OK.
d Press Mono Start or Colour Start.
The machine starts printing the
Alignment Check Sheet.
e Check the 600 dpi and 1200 dpi test
prints to see if number 5 most closely
matches number 0.
If the number 5 sample of both the
600 dpi and 1200 dpi are the best
matches, press + (Yes) to finish
Alignment Check, and go to step h.
If another test print number is a
better match for either 600 dpi or
1200 dpi, press - (No) to choose it.
f For 600 dpi, press d or c to select the
number of the test print that most closely
matches the number 0 sample (1-8).
Press OK.
g For 1200 dpi, press d or c to select the
number of the test print that most closely
matches the number 0 sample (1-8).
Press OK.
h Press Stop/Exit.
Checking the ink volume B
You can check the ink that is left in the
cartridge.
a Press Ink Management.
b Press a or b to select Ink Volume.
Press OK.
The LCD shows the ink volume.
c Press Stop/Exit.
Note
You can check the ink volume from your
computer. (See Printing for Windows
®
or
Printing and Faxing for Macintosh
®
in the
Software User's Guide on the CD-ROM.)
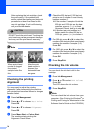
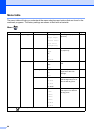
i
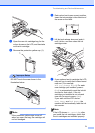
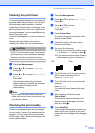
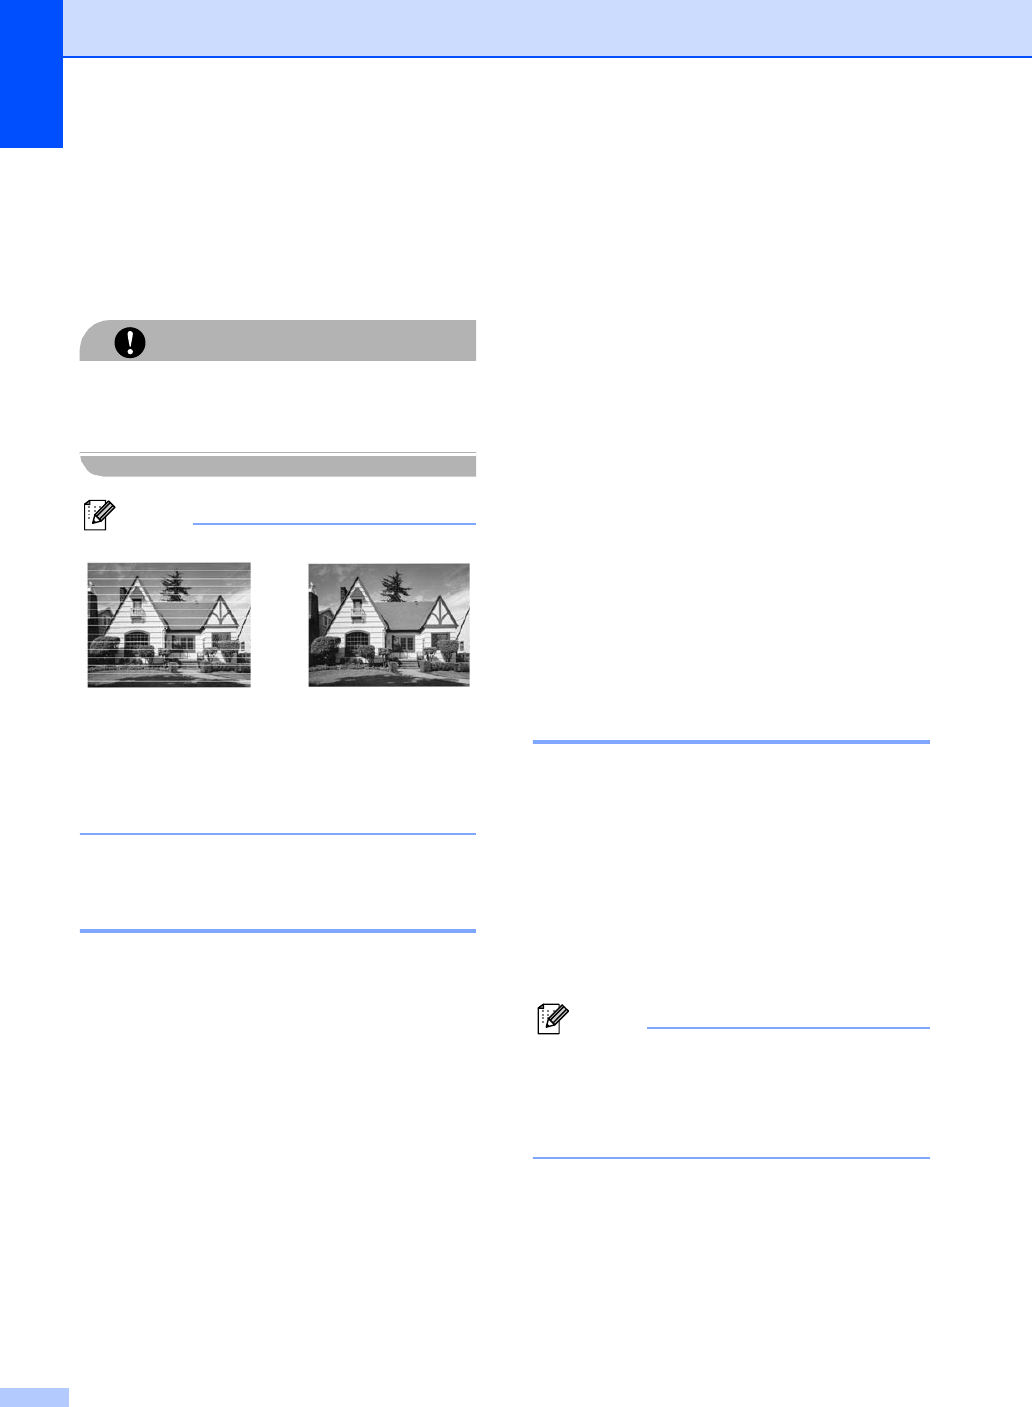
When a print head
nozzle is clogged
the printed
sample looks like
this.
After the print
head nozzle is
cleaned, the
horizontal lines
are gone.