CHAPTER 6 OPTIONS
6-16
I
I
I
N
N
N
S
S
S
T
T
T
A
A
A
L
L
L
L
L
L
I
I
I
N
N
N
G
G
G
A
A
A
H
H
H
D
D
D
D
D
D
(
(
(
H
H
H
A
A
A
R
R
R
D
D
D
D
D
D
I
I
I
S
S
S
K
K
K
D
D
D
R
R
R
I
I
I
V
V
V
E
E
E
)
)
)
1.
Turn off the printer, and then unplug the power cord from the AC outlet.
Disconnect the interface cable from the printer.
2.
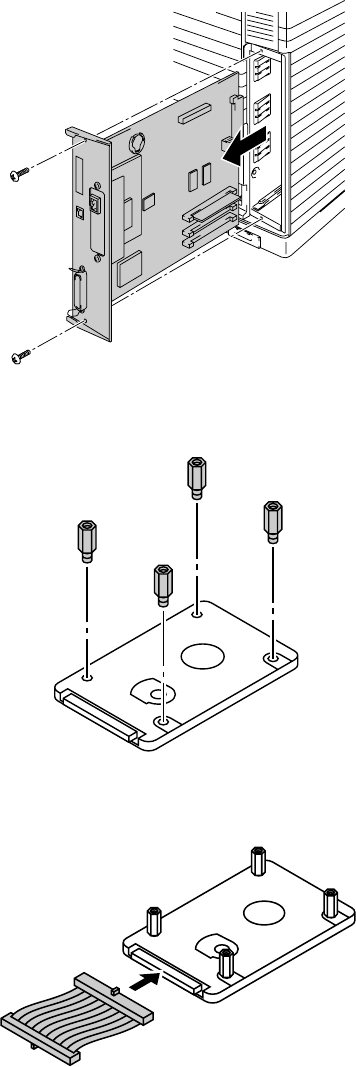
Unscrew the two screws securing
the rear plate of the main
controller board, and then pull out
the main controller board.
Fig. 6-20
3.
Insert the 4 shoulder screws
supplied with the HD-6G/HD-EX
unit into the bottom of the HD-
6G/HD-EX.
Fig. 6-21
4.
Connect the shorter Hard disk
cable to the HD-6G/HD-EX with
the keyed side upwards, ensuring
that it is correctly aligned.
Fig. 6-22


