40
Ch. 2 Getting Started
Getting Started
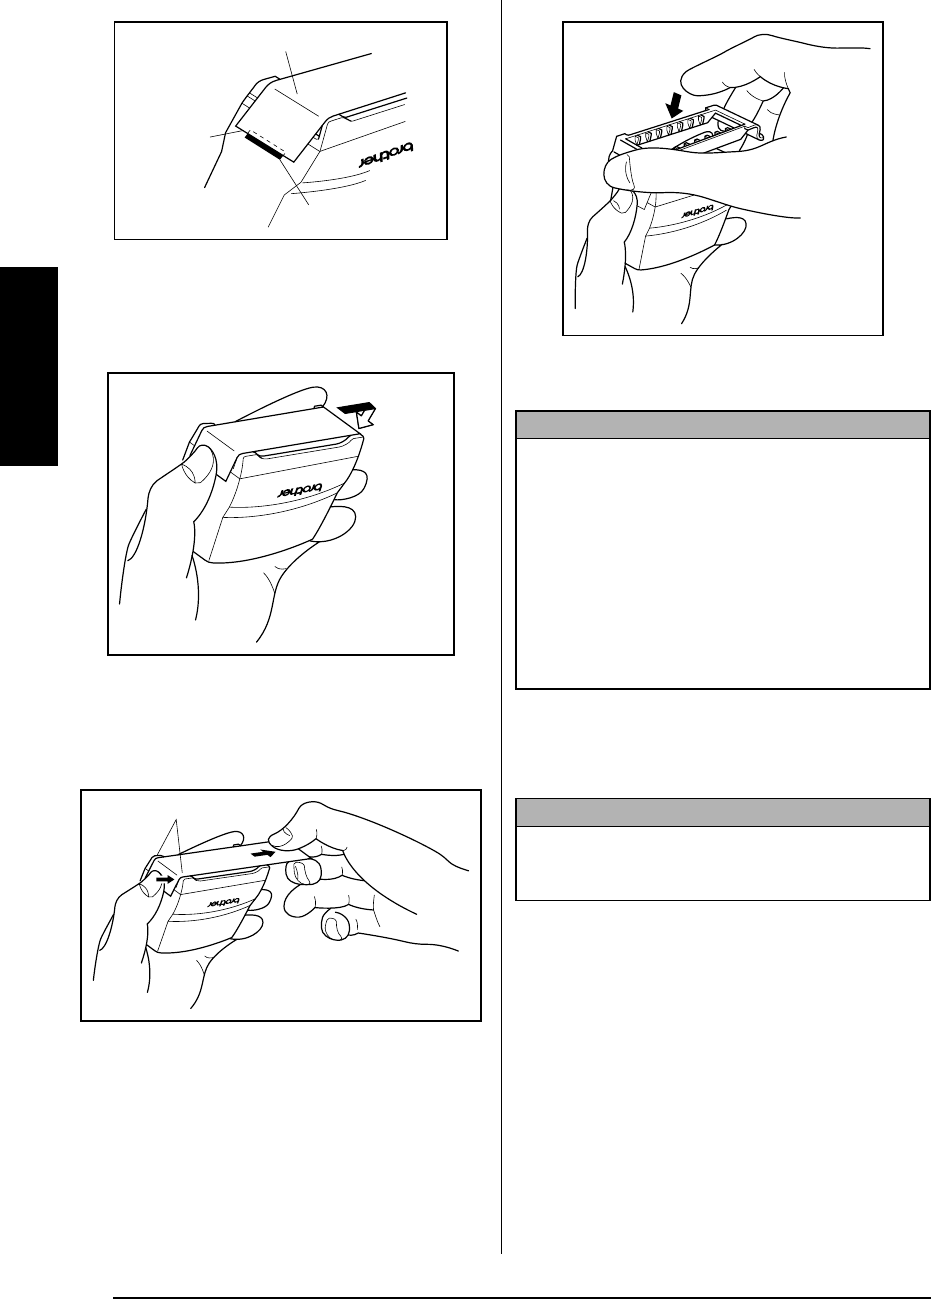
6 Hold the end of the stamp film in place with
your thumb, and then pass the stamp film
through the guides while pulling it tight.
7 Fold the other end of the stamp film over
the other side of the stamp holder and hold
it in place with your finger.
8 Fit the frame over the stamp film, and then
push the frame down into place.
9 Insert the stamp holder straight into the cap.
Attaching the identification label
1 Insert a TZ tape cassette into the tape com-
partment.
2 Press p to print out the identification label.
3 After the label is cut off, affix it to the end of
the holder so that its bottom edge is on the
same side of the stamp holder as the raised
“brother” logo.
Tape end
Glossy side
Slit
Fold over
Guides
NOTE
☞
Be sure that the cap correctly covers the stamp
in order to prevent ink spills.
☞
When the stamp is not being used, firmly cover
it with the cap and always store it standing up
with the stamp facing downward. Do not leave
the stamp laying on its side or leaning.
☞
Store stamp film holders and stamp film cas-
settes in a location where they are not exposed
to high temperatures, high humidity or direct
sunlight.
NOTE
Use 1/2" (12-mm)-wide tape to make an identifica-
tion label for an M-size stamp and use 3/4" (18-
mm)-wide tape to make a label for an L-size stamp.


