Small Office Remote Access Switch 65
IP R
OUTING
N
ETWORK
WITH
PPP D
EVICES
Configure SITE1
CONFIGURE SITE1
Note: The software should have already been installed and the system prompt should be
displayed before beginning the configuration.
Using the detailed instructions for these steps found in the Simple Remote Bridging chapter,
complete the following configuration steps.
Start the CFGEDIT program
Select physical resources
Select Switch type to be 5ESS
Select to add a line
Enter the line name
Select slot and port numbers
Select line interface type of “Point-to-Point”
Add Data Links
Choose Auto TEI Negotiation
The sections below provide instructions for completing the remaining configuration steps for SITE1
and SITE2.
CONFIGURING THE SYSTEM OPTIONS
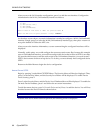
To begin the option configuration, press 2 at the Main Menu. The options menu will then be
displayed.
For this example, we only need IP routing enabled. The first thing to do: disable bridging. After
that, we will need to enable IP routing, and configure all the necessary IP routing information. To
disable bridging, press 1 at the Options Menu. Follow the onscreen prompts to disable bridging.
Press <return> to return to the Options Menu.
E
NABLING THE INTERNET PROTOCOL (IP ROUTING)
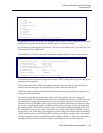
To enable IP routing and configure all the necessary IP routing information, press 2 at the Options
Menu. The abbreviated IP Configuration Menu will then be displayed.
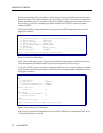
The next step is to enable the Internet Protocol (IP routing). Press 1, and follow the onscreen
instructions for enabling IP routing. The complete IP routing menu will then be displayed.
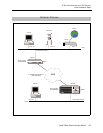
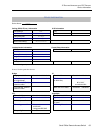
For this example, the additional IP information we need to configure is IP interfaces and a static
route. The next two section will provide the instructions needed to configure this IP information.


