Printing Maintenance
31
1 Ensure that the printer is on.
2 Open the Printer Utility dialog box.
(1) Select Page Setup…
Page Setup…Page Setup…
Page Setup… in the File
FileFile
File menu.
(2) Click Utilities...
Utilities...Utilities...
Utilities... to open the Printer Utility
Printer UtilityPrinter Utility
Printer Utility dialog box.
3 Start Print Head Deep Cleaning.
(3) When the confirmation message is displayed, click OK
OKOK
OK.
Note
z After print head deep cleaning finishes, print the nozzle check
pattern to verify that the print head nozzles are clean.
See "Printing the Nozzle Check Pattern
Printing the Nozzle Check PatternPrinting the Nozzle Check Pattern
Printing the Nozzle Check Pattern"
""
" on page 26.
z If the head is still not clean after the second deep cleaning, replace
the ink tank.
See "Replacing an Ink Tank
Replacing an Ink TankReplacing an Ink Tank
Replacing an Ink Tank"
""
" on page 36.
z If ink tank replacement does not resolve the problem, the print head
may be worn out. Contact the Customer Care Center.
Important The process takes about one minute to complete, so simply
wait until the POWER
POWERPOWER
POWER lamp stops flashing.
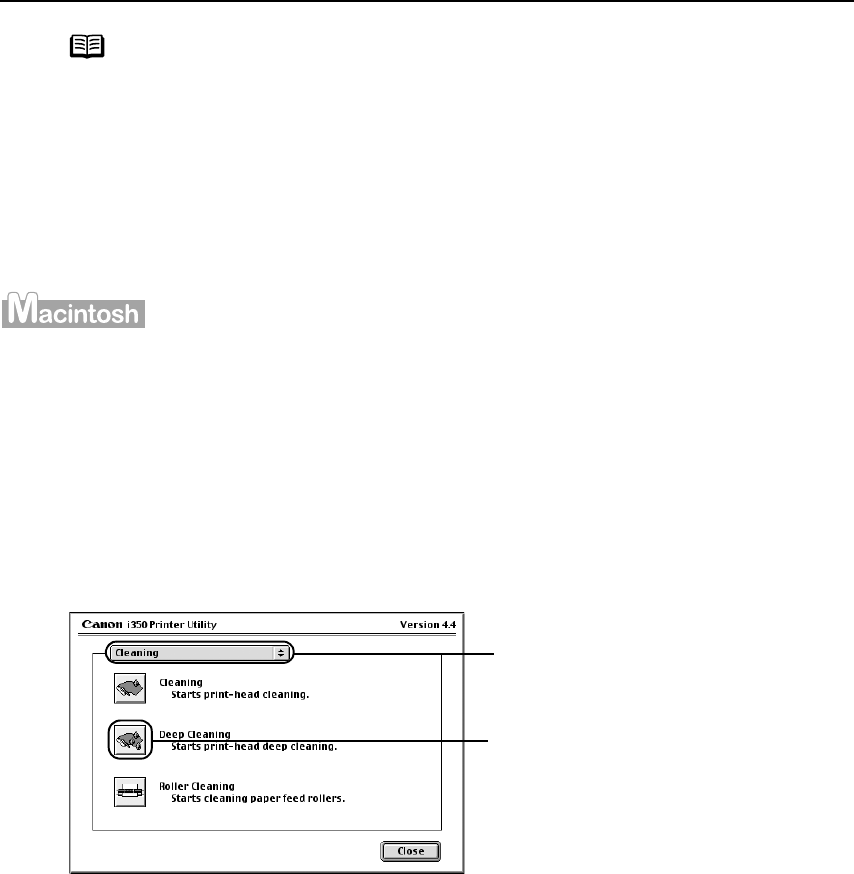
(1) Select Cleaning
Cleaning Cleaning
Cleaning from the
pull-down menu.
(2) Click Deep Cleaning
Deep CleaningDeep Cleaning
Deep Cleaning.
