


74-107
Cisco ASA 5500 Series Configuration Guide using the CLI
Chapter 74 Configuring Clientless SSL VPN
Configuring Browser Access to Client-Server Plug-ins
language is the abbreviation of the language rendered by the browser. This field is not used for file
translation; it indicates the language used in the file. To specify a particular language code, copy the
language abbreviation from the list of languages rendered by your browser. For example, a dialog
window displays the languages and associated language codes when you use one of the following
procedures:
• Open Internet Explorer and choose Tools > Internet Options > Languages > Add.
• Open Mozilla Firefox and choose Tools > Options > Advanced > General, click Choose next to
Languages, and click Select a language to add.
The following sections describe how to customize the help content visible on clientless sessions:
• Customizing a Help File Provided By Cisco, page 74-107
• Creating Help Files for Languages Not Provided by Cisco, page 74-108
• Importing a Help File to Flash Memory, page 74-108
• Exporting a Previously Imported Help File from Flash Memory, page 74-108
Customizing a Help File Provided By Cisco
To customize a help file provided by Cisco, you need to get a copy of the file from the flash memory
card first. Get the copy and customize it as follows:
Detailed Steps
Step 1 Use your browser to establish a clientless SSL VPN session with the ASA.
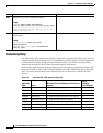
Step 2 Display the help file by appending the string in “URL of Help File in Flash Memory of the Security
Appliance” in Table 74-9, to the address of the ASA, then press Enter.
Note Enter en in place of language to get the help file in English.
The following example address displays the English version of the Terminal Servers help:
https://address_of_security_appliance/+CSCOE+/help/en/rdp-hlp.inc
Step 3 Choose File > Save (Page) As.
Note Do not change the contents of the File name box.
Step 4 Change the Save as type option to Web Page, HTML only and click Save.
Step 5 Use your preferred HTML editor to modify the file.
Note You can use most HTML tags, but do not use tags that define the document and its structure
(e.g., do not use <html>, <title>, <body>, <head>, <h1>, <h2>, etc. You can use character tags,
such as the <b> tag, and the <p>, <ol>, <ul>, and <li> tags to structure content.
Step 6 Save the file as HTML only, using the original filename and extension.