— 17 —
ENGLISH
1 Turn off the power of the printer.
2 Open the printer cover.
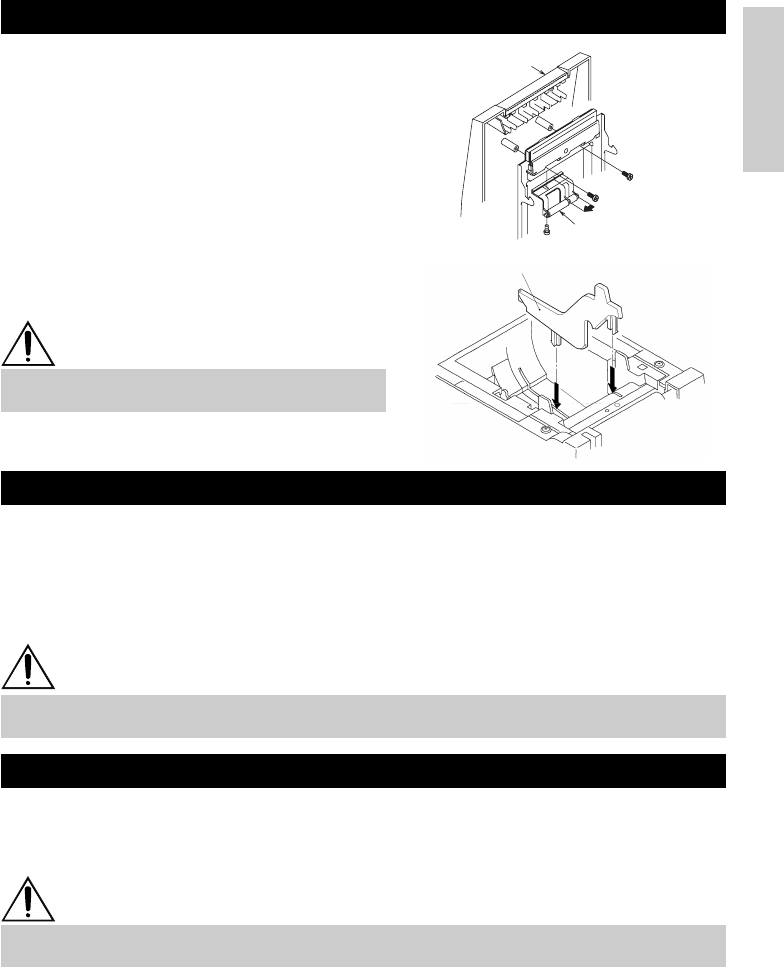
3 Take off two screws and remove printer
cover.
4 Take off damper retention screws,
reposition damper (11 mm) in the direction
of the arrow, then secure it with the
original screws again.
5 Replace printer cover on printer.
6 Install the supplied partition into the
position as illustrated.
7 Change DIP switch setting for 58 mm roll
paper, by referring to “SETTING DIP
SWITCHES”.
3.6 Using 58 mm Wide Paper Rolls
CAUTION
• Do not change DIP switch setting from 58 mm
into 80 mm roll paper in the middle of printing.
1 Open the printer cover.
2 Wipe off stains, such as dust and the like, on the heating element of the head using a
cotton swab soaked in ethyl alcohol.
3.8 Cleaning the Print Head
1 Turn off the power of the printer.
2 Open the printer cover.
3 Remove the paper jam including any paper chips remaining. (Also take out the paper
roll from the holder.)
4 Close the printer cover.
5 Turn on the printer. The auto cutter mechanism is initialized and the alarm is cleared.
3.7 Removing Jammed Paper
CAUTION
• The print head becomes hot immediately after printing. Do not touch it with your hand. Do
not touch the heating element of the head with a bare hand or metal object either.
CAUTION
• The print head becomes hot immediately after printing. Do not touch it with your hand. Do
not touch the heating element of the head with a bare hand or metal object either.
Printer cover
Damper
Partition


