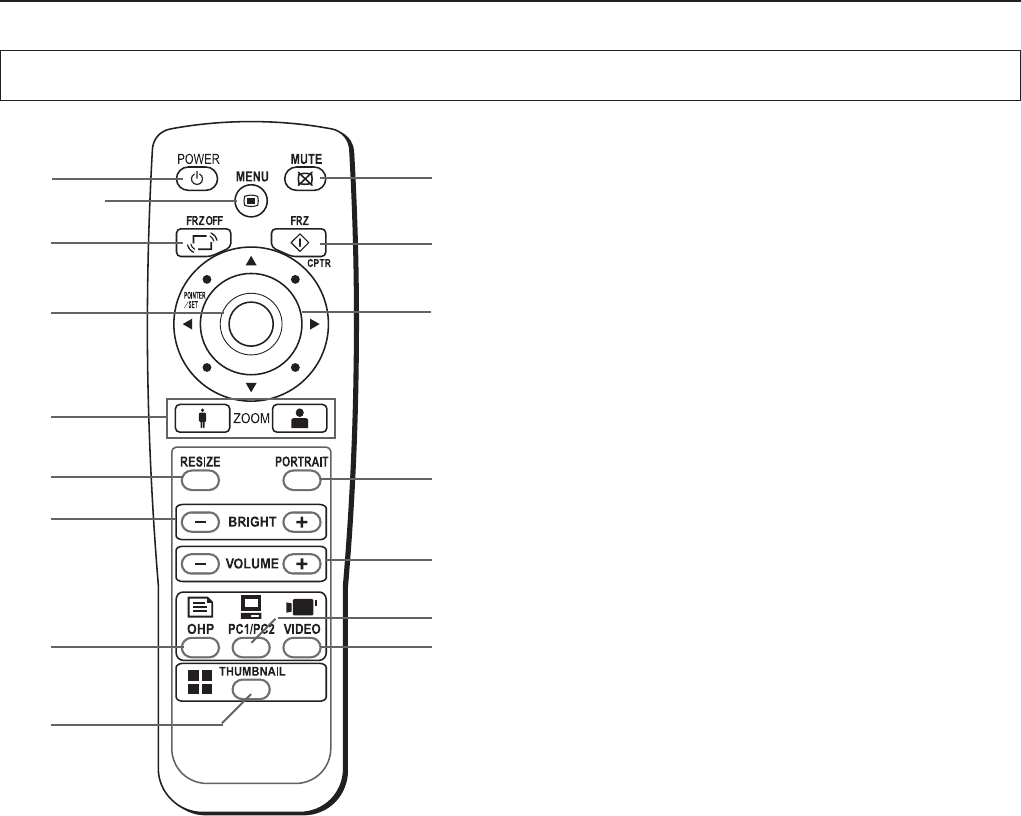
Names and Functions of the Parts (Remote Control)
1. POWER Button
Switches the power of the projector on or off (standby
mode).
• Only this button is effective when the projection lamp is
off.
See Page E-21.
2. MUTE Button
Temporarily blanks the projection screen without switching
off the lamp. One more press causes the screen to return
immediately.
See Page E-29.
3. MENU Button
Switches on or off the display of the menu screen.
See Page E-32.
4. FREEZE OFF Button
Cancels the still image mode.
This is used when checking the projection screen while
moving the document.
See Page E-27.
5. FREEZE/CAPTURE Button
Makes the projection screen image into a still image. In the
OHP mode, the image is stored in internal memory as a
thumbnail.
See Page E-26.
6. SET/POINTER Button
During menu display, this button advances the menu to
the next level. This button finalizes the setting at the time
of item selection. See Pages E-29 and 32. This button
displays a pointer when the menu screen is not displayed.
Press this button one more time to make the pointer disap-
pear.
7. SCROLL Buttons
Sets the selection of the item or the adjustment value at
the menu screen. Moves the zoom position during a zoom
display. Moves the pointer when the pointer is being dis-
played.
See Pages E-24, 25, 28, 29 and 32.
8. ZOOM Buttons
These buttons adjust the magnification of the projection
screen.
See Page E-24.
9. RESIZE Button
• Press to change the size of the projected image when
OHP is selected.
• Press to do automatic synchronous adjustments when
PC is selected.
See Page E-25.
10. PORTRAIT Button
Selects the orientation of the projection screen. The display
of the switched screen is adjusted to match the width.
See Page E-23.
11. BRIGHTNESS Buttons
These buttons adjust the brightness of the projection
screen.
See Page E-26.
12. VOLUME Buttons
These buttons adjust the volume when the PC or video is
selected.
See Page E-28.
13. OHP Button
Switches the projector to OHP input. See Page E-23.
14. PC1/PC2 Button
Switches the projector to PC input. See Page E-23.
15. VIDEO Button
Switches the projector to video input. See Page E-23.
16. THUMBNAIL Button
Displays the captured still image as a thumbnail.
See Page E-27.
1
4
6
8
9
11
13
16
2
10
12
5
3
14
15
7
A Check of the Supplied Items and the Names of the Parts


