


48 user’s guide
3 Click the Audio tab.
4 Click the option for the number of speakers to match your multi-channel
speaker system, and then click Apply.
NOTE: To test the speakers (multi-channel speakers only), click the Test
button. The WinDVD control panel shows the speaker number being used.
Click Stop.
5 Click OK.
NOTE: If you want to play a stereo DVD, change the audio properties of
WinDVD to match the recorded DVD audio output.
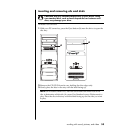
using a microphone
Your PC comes with one microphone connector in the back of the PC. Some
models have a second microphone connector in the front of the PC. Only one
microphone connector works at a time, and the back connector is ready to use
unless you have the multi-channel audio speakers option. For PCs with the
multi-channel audio speakers option, the microphone connector in the front of
the PC, if present, is ready to use. See “using the microphone with multi-channel
audio“ on page 49.
To use a microphone connected to the front of your PC (select models only),
select the working microphone.
NOTE: If you connect your microphone to the back of your PC, you do not need
to perform this procedure.
1 Double-click the Volume icon on the taskbar. The Volume Control settings
window opens.
NOTE: If you do not see this Volume icon, click Start, click Control Panel,
click Sounds, Speech, and Audio Devices, if it is present, and then double-
click Sounds and Audio Devices to open the Sounds and Audio Devices
Properties window. On the Volume tab, place a check in the Place volume icon
in the taskbar check box. Click Apply, and then click OK. The Volume icon
appears in the taskbar.
2 Select Options and click Properties.
3 In Adjust volume for, click Recording.
4 In Show the following volume controls, place a check in the Microphone
check box.
5 Click OK.
6 Click the Advanced button in the Microphone column. If you do not see the
Advanced button, select Options from the Recording Control window, and
then click Advanced Controls.