


Removing and Replacing Parts: Dell Precision Workstation 470 and 670 Computers User's Guide
file:///T|/htdocs/systems/ws670/EN/ug_en/before.htm[3/20/2013 9:31:52 AM]
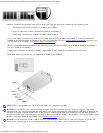
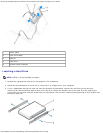
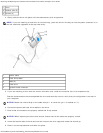
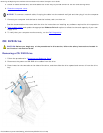
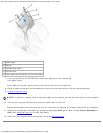
1 power cable
2 hard-drive cable
3 tabs (2)
4 hard drive
5 system board connector
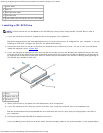
Installing a Hard Drive
NOTE: SATA2_0 is the bootable connector.
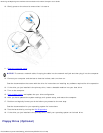
1. Unpack the replacement hard drive, and prepare it for installation.
2. Check the documentation for the drive to verify that it is configured for your computer.
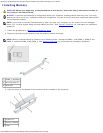
3. If your replacement hard drive does not have the bracket rails attached, remove the rails from the old drive by
removing the two screws that secure each rail to the drive. Attach the bracket rails to the new drive by aligning the
screw holes on the drive with the screw holes on the bracket rails and then inserting and tightening all four screws (two
screws on each rail).