


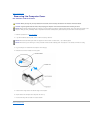

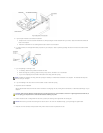
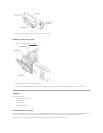
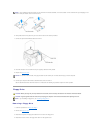

2. Grasping the lever on the sliding plate, pull the sliding plate to the right and hold in place.
3. Push from the inside and pivot the drive panel to the left to release the panel from its side hinges.
4. Set the drive panel aside in a secure location.
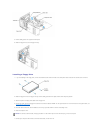
Removing the Drive-Panel Insert
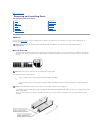
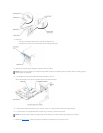
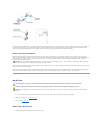
1. On the inside of the drive panel, pinch the two drive-panel insert release tabs together and pull the insert out and to the right just enough to release it
from the drive panel.
2. Set the drive-panel insert aside in a secure location.
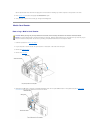
Replacing the Drive-Panel Insert
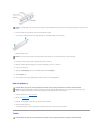
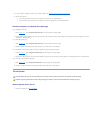
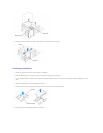
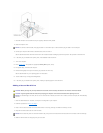
1. Place the drive-panel insert tab into the drive-panel slot.
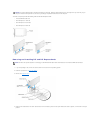
2. Pinch the drive-panel insert release tabs and press the drive panel insert into place.
NOTE: The sliding plate secures and releases the drive panel and helps to secure the drives.
NOTICE: Drive-panel inserts may contain screws on the inside. You can attach the screws to new drives that do not have any screws.
NOTICE: To avoid breaking the drive-panelinserttab,donotpulltheinsertmorethanapproximately1cm(½inch)awayfromthedrivepanelbefore
sliding the tab out of the slot.