


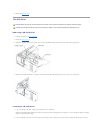
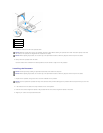
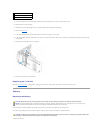


9. Lift the fan release lever, then slide the fan toward the back of the computer to release it from the bottom cover.
10. Remove the fan from the computer.
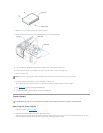
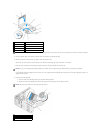
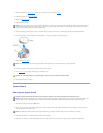
11. Disconnect the control-panel cable from the I/O panel connector by pulling with the cable loop.
12. Remove the drive panel.
13. If an optional sound card is installed, disconnect the cable from the edge of the I/O panel.
14. If an optional IEEE 1394 cable is installed in the front port, remove the cable from the front of the computer by following the instructions that came with
the connector.
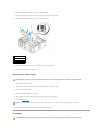
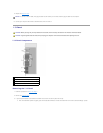
15. Remove the mounting screw from the I/O panel.
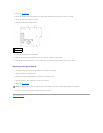
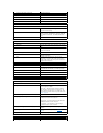
1
heat sink and fan shroud assembly
2
captive screw housing (2)
3
drive panel
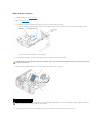
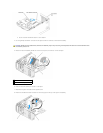
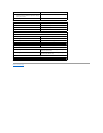
16. Remove the I/O panel from the computer.
Replacing the I/O Panel
Follow the removal procedure in reverse order, ensuring that the tabs on the top panel, bottom panel, and front panel are secure.
Battery
Replacing the Battery
A coin-cell battery maintains computer configuration, date, and time information. The battery can last several years.
If you have to repeatedly reset time and date information after you have turned on the computer, replace the battery.
To replace the battery:
CAUTION: Before you begin any of the procedures in this section, follow the safety instructions in the Product Information Guide.
NOTICE: To prevent static damage to components inside your computer, discharge static electricity from your body before you touch any of your
computer's electronic components. You can do so by touching an unpainted metal surface on the computer.
CAUTION: A new battery can explode if it is incorrectly installed. Replace the battery only with the same or equivalent type recommended by the
manufacturer. Discard used batteries according to the manufacturer's instructions.